About Mane Adige

My photo
"Mane Adige" means "Home Food" in kannada and this blog is all about recipes that I cook. Most of the recipes I post here will be from "Mangalooru" and "Bengalooru " regions of Karnataka,India. Rest of them are the one's which I try out by improvising the recipes got from different sources.
Showing posts with label Mangalore Dishes. Show all posts

Monday, January 10, 2011

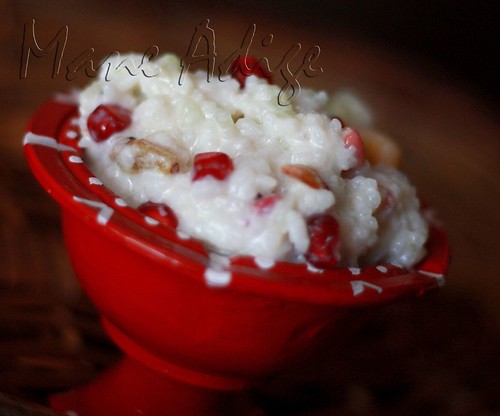
Mosaranna/Curd Rice


No South Indian meal is complete without some curd rice at the end. In its simplest form, it is just some rice mixed with a little yogurt and served with some pickle. However, let your imagination flow…. Add whatever you think would taste good – fresh fruits, dry fruits, nuts… anything! Here is how I usually make it.

Ingredients:

1 cup White rice – I like mine to be mushy and well cooked

1 cup Yogurt/Curds

¼ cup Red onions, finely chopped

¼ cup Cucumber, finely chopped

½ cup chopped fresh grapes + pomegranate

3-4 strands Cilantro, finely chopped

Salt as per taste

For Tempering:

2 tsp Oil

1 tsp Mustard

3-4 Curry leaves

1 tsp Chana dal

1 tsp Urad dal

2-3 nos Chilies , Dry red or Green ones- chopped into pieces

1 tsp Ghee

1-2 tbsp raisins + cashews

Method:

  1. Mix all the ingredients in a large mixing bowl; Add water to get the desired consistency; adjust ingredients according to taste.
  2. Heat ghee in a pan and roast raisins and cashews for a minute or until they turn lightly golden in color; add to the curd rice mixture and mix well.
  3. Temper with the mustard, chana dal, ural dal, curry leaves and chilies; Serve chilled towards the end of the meal

Prep Time: About 15-20 mins;

Serves: About 2-3 people;

Friday, January 7, 2011

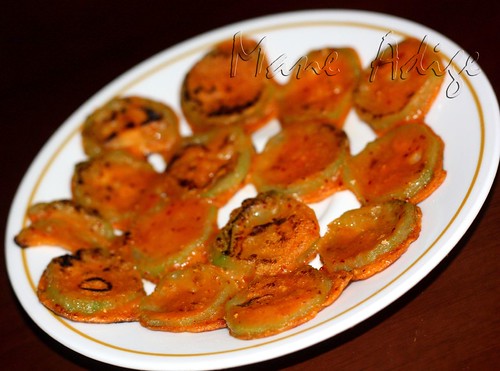
Heerekai Dose/ Dosas with Chinese Okra


New Year Wishes to all Mane Adige readers!!! I hope the new year brings along a lot of joy, happiness and prosperity to everyone....

Okay, so today's recipe is a little unconventional and yet very traditional! This, out of the box dosa recipe is a Mangalorean speciality dish.....Like I've always said, give us Mangaloreans any vegetable and we'll make a dosa out of it! :) Though this dish is called dosa, it is more of shallow fried pakoras. Decide for yourself what you want to call them, after having gone through the recipe!

Ingredients:

Batter ingredients same as Uppu Huli Dosa

1 Chinese okra, heerekai

2-3 tsp Oil

Method:

  1. Make batter as explained in the method for Uppu Huli Dosa; Only difference being that, the batter should be a little thicker (like that of regular besan batter for pakoras)  and not as watery as Uppu Huli Dosa. Keep aside.
  2. Roughly peel the chinese okra to remove the sharp and prickly skin; Chop them into circular rings.
  3. Heat a pan and smear a few drops of oil on it; Dip the chinese okra rings in the dosa batter and arrange them on the tava adjacent to each other, in the shape of a dosa.
  4. Pour a few drops of oil on it and cook covered on both sides on low-medium heat.
  5. Remove from stove and relish hot with a blob of ghee/butter.
Note:
  • While arranging the chinese okra on the pan, make sure that the pieces touch each other, so that they stick as they get cooked.
  • After arranging the Chinese okra pieces on the pan, you could pour some batter to fill the gaps in between the pieces; This way, it would look more like traditional dosas :)

Prep Time: About 15-20 mins(excluding soaking time);

Makes: About 3-4 medium sized dosas;

Tuesday, December 28, 2010

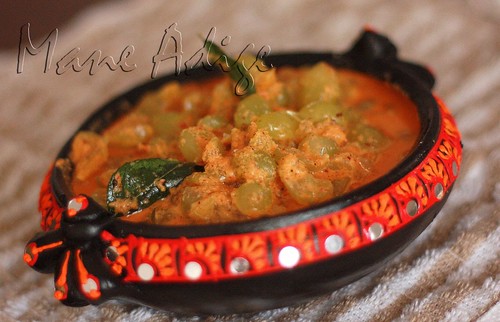
Drakshi Saasive/Fresh Grapes in Coconut & Mustard Sauce


So, I got  this pack of fresh green grapes from the store over the weekend. I was actually picking up some grapes after over a year.... While Aadi was an infant, his ped had asked us to keep him away from grapes for a  little while so he wouldn't catch any cold and cough. And now that he's a year old, I thought it would be a good idea to introduce them to him. But to my disappointment, the grapes were so sour that they weren't good for even juices :(

My mother in law  is great with innovative recipes and  using up left overs. So I picked up the phone and called her up to see if she could suggest something with the sour grapes that I had in hand.  She  suggested I make Saasive- an instant Mangalorean dish that needs no cooking on the stove top and takes very few ingredients. With just red chilies and mustard as spices, it was amazing how flavorful the dish had turned out! Definitely worth  a try and its just right for when you need a change from the usual .

Ingredients:

1 cup  Fresh grapes (I used the green ones, you could use the black variety as well)

1/2 cup Grated coconut, fresh/frozen

3-4 Dry red chilies, low-medium spiced

1/4 tsp Tamarind paste (optional)

1/2 tsp Jaggery (optional)

1.5 tsp Mustard

2 tsp Oil

1 strand Curry leaves

A pinch of Hing

Salt as per taste


Method:

  1. Wash and slit each grape in the center and keep aside.
  2. Grind coconut, red chilies , tamarind, jaggery and salt to a smooth paste with some water; Towards the end, add half a tsp of mustard and pulse a couple of times.
  3. Add the ground masala paste to the grapes and mix well; Add water to get the desired consistency; Adjust ingredients according to taste.
  4. Temper with mustard, hing and curry leaves; Serve immediately with hot steamed rice and relish!

Tip:

  • While grinding mustard with the other masalas, keep in mind that adding too much mustard will make your dish bitter; So add just a little of it towards the end.
  • If your grapes are really sour, you might wanna do away with tamarind altogether, like I did with mine this time; Or if your grapes are sweet, you might wanna let go of jaggery!

Variation: Instead of grapes, you could also use cucumbers,pineapple or  mangoes.

Prep Time: About 10-15 mins;

Serves: About 2-3 people;

Friday, December 3, 2010

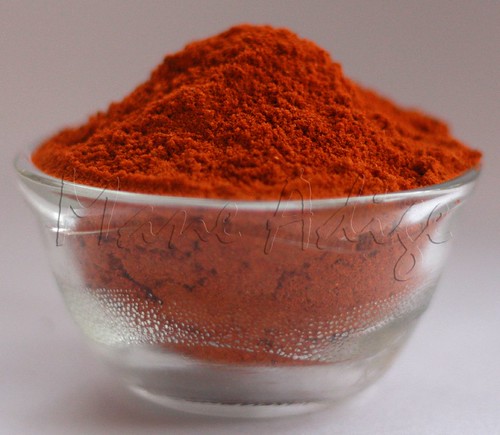
Rasam Powder/ Saarina Pudi/Menasina Pudi


Rasam powder, THE KING of all masalas, is the most essential ingredient in any South Indian pantry. This basic South Indian masala is used in several other dishes like Avarekai Sambhar (grind 2-3 tsp of rasam powder with coconut and use as an alternate masala), Avalakki upkari, Tomato Gojju, Puliyogare Gojju (Recipe coming soon!), Punarpuli Rasam, Tomato Puree Rasam, Bolu Huli, Bitter Gourd Sabzi, Gojjavalakki and several other dishes. So, if you have the rasam powder in stock, you could get your meal ready in just a few minutes!

Ingredients:

1 cup Jeera

1 cup methi seeds/fenugreek

1 cup Black pepper

1 cup Mustard

8 cups Coriander seeds

6-8 cups Dry red chilies, adjust quantity according to taste

3 cup Curry leaves

Method:

  1. Dry roast each of the ingredients separately until you smell the fresh aroma of the spice and the color changes lightly;Keep aside and let cool.
  2. Powder the roasted spices in a blender; DO NOT add any water while powdering.
  3. Store in airtight containers; To make rasam, follow Tomato Puree Rasam.

Tip:

  • While measuring red chilies, chop them into tiny pieces; This way, its a lot easier to stuff into cups and measure them.
  • While powdering, you might want to powder coriander seeds and dry red chilies  separately 'cause, coriander seeds and red chilies take longer to grind.
  • Rasam powder has a shelf life of about 6 months, so feel free to make enough and store in air tight containers.
  • You might want to store this masala in the refrigerator to retain its freshness and aroma.

Prep Time: About 30-40 mins;

Makes: Enough to fill a 500ml bottle;

Thursday, October 21, 2010

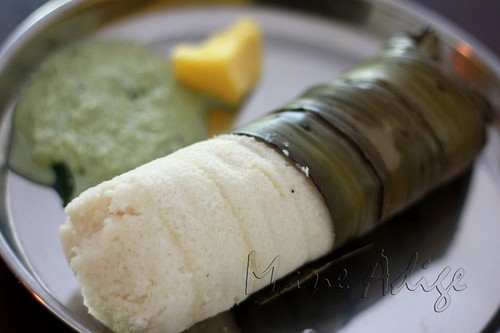
Moode/Mude ("Kedige" Flavored Idlis)


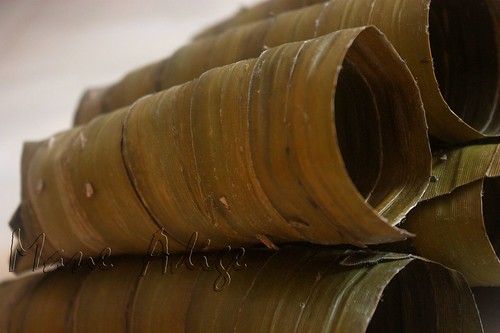
This ones a very traditional Mangalorean recipe! Idli batter is filled into moulds made of a certain variety of leaf, known as Kedige in Kannada (English: Screw Pine. Read more here). These leafy moulds add a distinct flavor and aroma to the idlis that makes them really unique and delicious! Moode is made on special occasions like festivals and weddings. These kedige leaf moulds, more popularly known as "moode ele" are available in most vegetable markets during festive season. For those of you that have never seen moode  ele, here's how the moulds look


Here is how to make it...

Ingredients:

1 cup urad dal (Soaked in water for about 4-6 hours)

2 cups idli rava / White rice (Soak white rice in water for 4-6 hours)

Salt as per taste


Method:

  1. Grind the soaked urad dal to a smooth dal until it froths up and increases in quantity.
  2. Wash the idli rava and drain out all the water; Add rava to the urad batter and grind further until it blends well with the batter (About 3-5 minutes). If you are using soaked white rice, drain out all the water and add to urad batter; Grind until it blends well and forms a smooth paste.
  3. Transfer into a large mixing bowl and let ferment overnight or for 8-10 hours; Add salt and mix well.
  4. Pour into moode ele (kedige moulds) and steam cook for about 20-25 minutes; Moode is done when no grains stick to the fork when pierced.
  5. Remove from stove and serve hot with coconut chutney, sambhar, gashi or any other side dish of your choice.

Note:

  • If you are grinding urad dal using the blender, it generally takes about 10-15 minutes for the batter to froth up; Make sure you stop every 5-7 mins and mix with a spatula. In case of a grinder, it takes about 25-30 minutes.
  • While storing the batter for fermenting, make sure the bowl is large enough to accommodate the rise in batter quantity.
  • While pouring the batter into moode ele, fill it only up to three fourths.... Moode will rise further while it cooks.
  • I use a pressure cooker (without weight) to steam idlis and moode. You could also use idli cookers that are available in the market. In either case, add enough water at the bottom to withstand 20 minutes of steaming.
  • It is important to ensure that moode ele stays upright while it cooks. You wouldn't want the moode to fall off and let the water from the bottom of the cooker get in. So, I place each moode separately inside long steel tumblers.
  • To remove the moode from the mould, slowly pull out the tiny sticks that hold the mould together; The mould will fall apart automatically.

Tuesday, October 12, 2010

Avalakki Oggarane/ Avalakki Uppittu (Seasoned Poha)


Here is one of the simplest and quickest breakfast dish that I have come across. This one gets done in less than 15minutes! It tastes great with a hot cuppa and hence makes for a wonderful tea time snack.

Ingredients:

1 cup Thick Poha/Flat Rice

1/2 cup finely chopped Onions

1 tbsp vegetable oil

1 tsp Mustard seeds

1 tsp Cumin seeds

1/2 tsp Turmeric/Haldi (optional)

1 strand Curry leaves

1 tbsp Chana+Urad Dal mixture

1 tsp Peanuts/Cashews (optional)

1 Green Chili, chopped finely

1/2 tsp Sugar

1 tsp Lime juice

1tbsp grated coconut, fresh/frozen

1 tbsp finely chopped Cilantro (optional)

Salt as per taste

Method:

  1. Heat oil in a heavy bottomed pan; Temper with mustard seeds, green chili, curry leaves, dal mixture and peanuts.
  2. Add finely chopped onions and fry until they turn lightly brown in color; Saute regularly.
  3. Meanwhile, wash and soak thick poha in water for about 3-4 minutes; Drain out all the water and keep aside.
  4. Once the onions are done, add poha, salt, sugar, grated coconut and mix well; Cook for about a minute or two.
  5. Switch off the stove; Add lemon juice and mix well.
  6. Garnish with chopped cilantro and serve hot.

Prep Time: About 15-20 mins;

Serves: 1-2 people;

Tip:
  • Vary the soaking time for poha depending on how soft you want it. Longer you soak, the softer it becomes.
  • Use cooked rice instead of poha, and it becomes "Chitranna", a mixed rice variety that makes for a sumptuous one pot meal!!

Wednesday, February 24, 2010

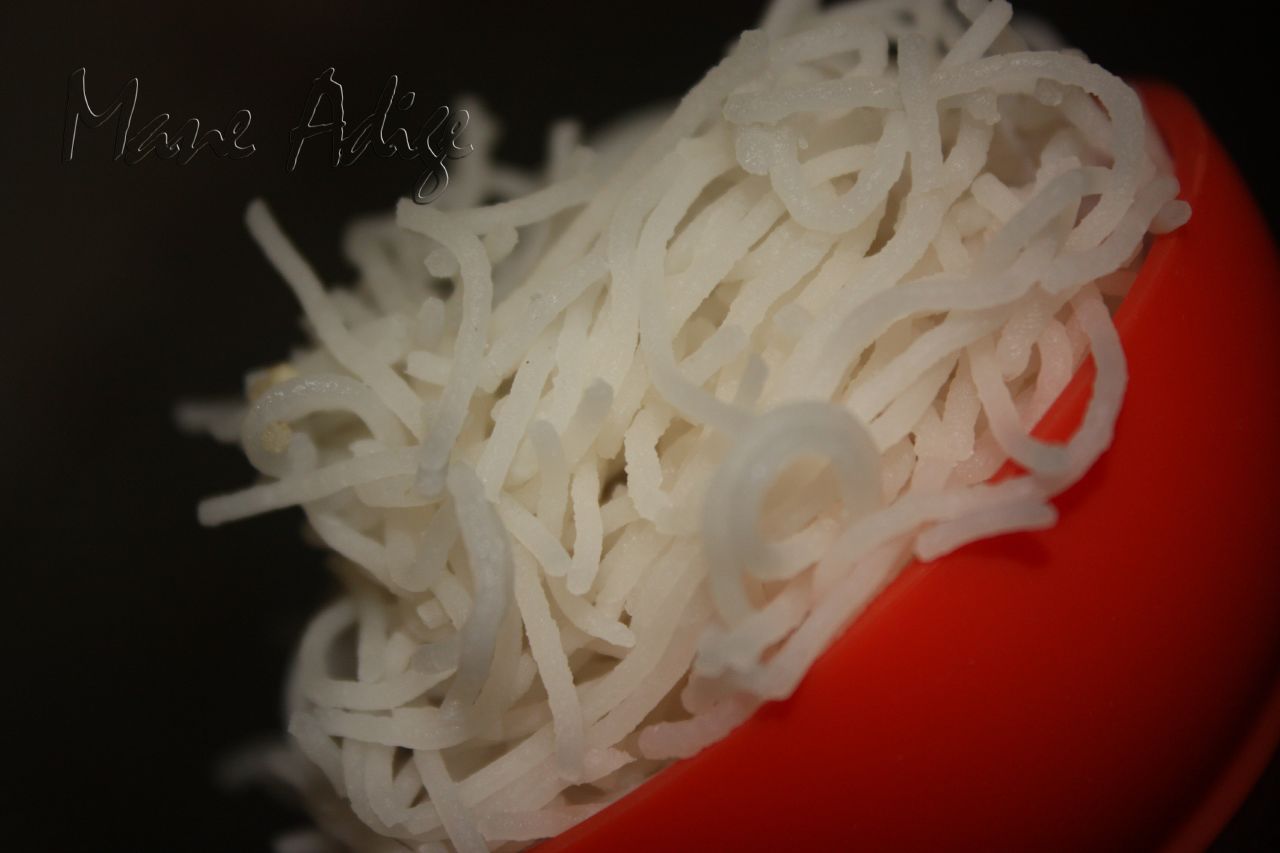
Ottu Shavige/ Semige/ Home made Rice Noodles


So, its been over a month since my last post on Mane Adige. My little boy was sick for a couple of weeks last month and I've been busy with his ped checkups and tests. Haven't really been able to collect too many recipes this month, but here's a traditional one from my drafts. This delicious recipe is easier told than actually made! But Shavige is definitely worth all the effort you put in. Shavige is made in many different methods. Here's the easiest and the one that my mother in law follows.

Ingredients:

3 cups Boiled Rice (uncooked)

1 cup White Rice (uncooked)

Salt as per taste (optional)

Method:

  1. Soak boiled rice and white rice in enough water for about 4-5 hours.
  2. Grind the soaked rice to a smooth paste; Use as little water as possible.
  3. Pour the ground paste into a heavy bottomed pan and cook on medium flame.
  4. Saute regularly and cook until all the water evaporates and the mixture forms a single dumpling.
  5. Separate into smaller tangerine sized dumplings and steam cook for about 15 minutes; I use a pressure cooker (without weight) to serve the purpose. The dumplings are cooked when a knife pierced into it comes out clean without any crumbs sticking onto it. Note: Make sure the dumplings are cooked well. Shavige would stick to each other and come out as a lump, if it isn't well cooked.
  6. Press into thin noodles using the chakli or Shavige press.
  7. Cool and relish with sambhar, pickle, Gasagase Payasa or any other side dish of your choice.
  8. OR make the Chitranna masala and mix to make shavige chitranna.

Note: Use the "bille" (the circular, detachable bottom portion of the press containing perforations, through which the dough oozes out) with multiple tiny perforations for making shavige.

Friday, November 27, 2009

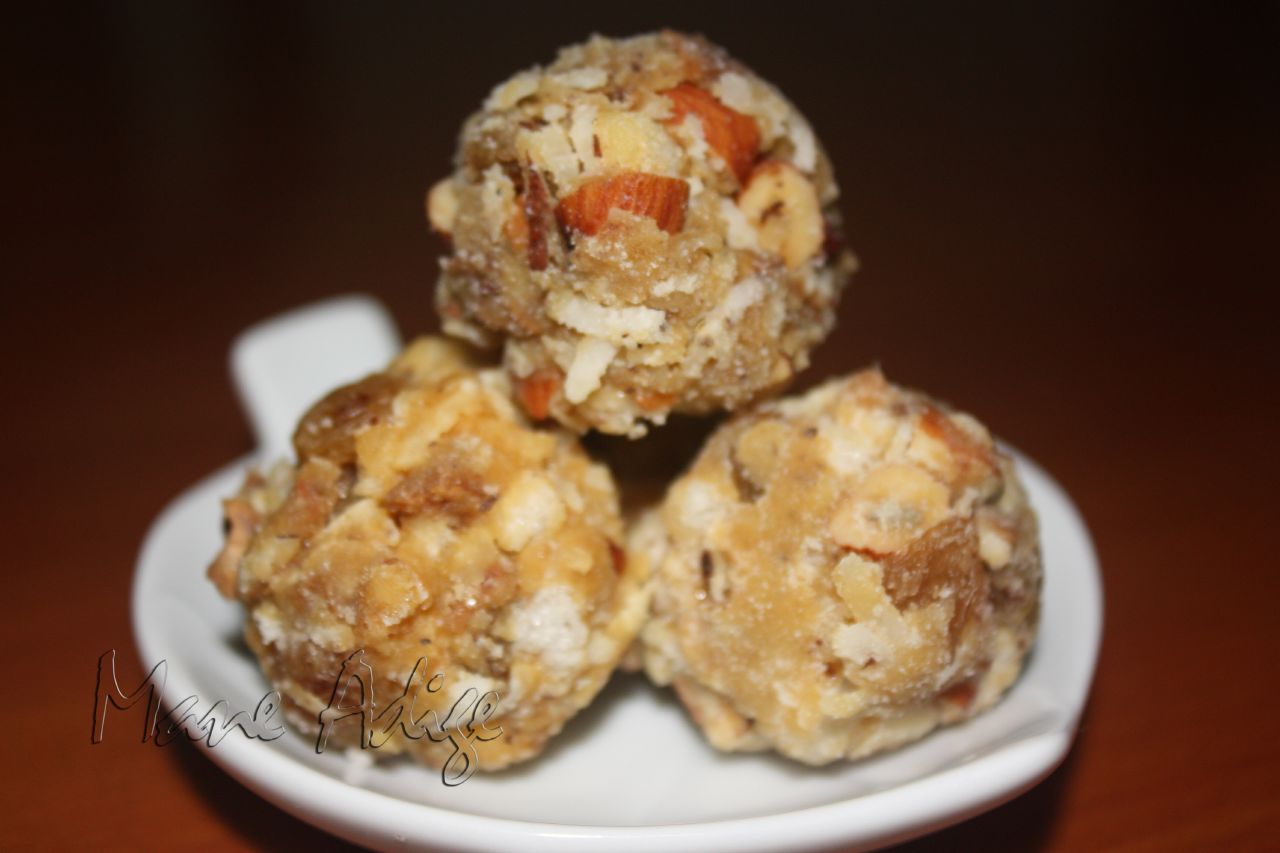
Antinunde/Karadantu / Laddu with Edible Gum


Hey folks! Hope alls well with you all... The update from my end is that, Naveen and I were blessed with a baby boy on the 13th of Oct 2009! Things have been hectic at my end ever since... Each day has been a different learning experience. Despite all the sleepless nights and Aadi's seemingly never ending crying sessions, motherhood has been a wonderful experience. It is such a pleasure to watch them grow, I tell ya! :)

Thanks to Amma and Ajji's 'Baananthana( in simple words, postpartum care and attention given to the new mom), I am learning quite a few unique dishes out here. One such dish is "Antinunde".  Edible gum, that is used in making this laddu is high in medicinal value. A lot of dry fruits also go into these laddus making them rich and nutritious. "One Antinunde a day strengthens your spine", my Ajji says. This laddu is more commonly known as Karadantu( or Karidantu) in the northern parts of Karnataka. If I am not wrong, this laddu is also known by the name "Ding Laddu" in Mangalore-Udupi regions of Karnataka.

Ingredients:

1 cup Edible gum, finely chopped

1 cup Almonds/Badami, finely chopped

1 cup Dry Dates/Uttutte, finely chopped

1 cup Raisins

1 cup Desiccated Coconut/Copra/Kobbari grated

1.5 cups Jaggery

1-1.5 tbsp Khus khus/ Gasagase (optional)

2 tbsp Ghee/Clarified butter for roasting

Ghee for deep frying

Method:

  1. Heat ghee in a heavy bottomed pan for deep frying.
  2. Drop the chopped edible gum pieces into hot ghee and fry until they puff up; Remove from pan and drain on paper towels.
  3. Dry roast khus khus and keep aside;
  4. Heat 2 tbsp ghee in a pan and roast the chopped almonds until they turn lightly golden brown; Keep aside.
  5. Dry roast the desiccated coconut and keep aside;
  6. Mix all the dry fruits, desiccated coconut, fried edible gum and khus khus in a large mixing bowl and keep aside.
  7. Heat jaggery in a heavy bottomed pan and add just enough water to cover the jaggery; Boil until jaggery dissolves and forms a syrup with thread like consistency. Note: To test if the syrup is ready, pour a drop into a bowl of cool water. If the solution forms a tiny lump and does not dissolve in water, the syrup is ready.
  8. Pour the syrup into the above mixture little by little and mix well.
  9. Grease you palm with a drop of ghee; Take some of the mixture in your palm and make laddus of desired size; Repeat for remaining mixture as well.
  10. Let cool and store in air tight containers.

Prep Time: About 50-60 mins;

Makes: About 25-30 laddus;

Tuesday, August 25, 2009

Nimbekai Uppinakai/Lemon Pickle


Hey folks, I'm back! I have been off blogging for over a month now, haven't I ??!?! Time flies here in India... really!! :) August has been a busy month for Naveen and me. We landed in Bengalooru on the 24th of July... The first few days went by in deciding on my doctor and hospital, getting the Internet connection up and running, getting a SIM card for each of us and other such immediate necessities. I have decided to go ahead with Columbia Asia, Hebbal for my delivery.... Any suggestions/experiences/opinions regarding Columbia Asia, Hebbal are more than welcome! :)

After the major task of choosing my doctor and hospital, I was at my in-laws place for a couple of weeks at Mangalooru. Rainy season that it is in India right now, it was pouring cats and dogs in the coastal city of Mangalooru (or Mangalore, as it was known till recently).... Not that it helped in cooling down the weather in any way!!! Despite the heavy rains and the high temperatures, I managed to have a wonderful time out there... hogged on all the traditional south canara dishes, stalled the famous "Pabbas" ice cream parlor almost daily, met up with all our good friends! My in-laws had also arranged for a traditional  and elaborate "Seemantha" ceremony for me. Got done with all that and returned to Amma's place in Bangalore last week. And now that even Naveen is back to work in Mangalore, I seem to have a lot of free time in hand. I am also enjoying all the pampering while it lasts :)

Both, my Ajji (Mom's mom)  and amma, make amazing pickles. This traditional recipe for lemon pickle is theirs too. Glad that I was with amma when she was making it last time.... I got a chance to take a few pictures and learn the procedure. Though very easy to make, I must warn you before hand that this one is a very time consuming procedure and it takes a lot of patience . But once you get to taste this pickle, you will never like any of the store bought ones.  So, all you folks who love home made pickles and have the patience to wait, should definitely try this one!!


Ingredients:

10-12 Fresh lemons, medium sized

15-20 Dry Red Chilies, low to medium spiced

2 tsp Methi seeds

1 tsp Hing

Salt as per taste and requirement

Method:

  1. Wash and chop each lemon into 8 pieces and keep aside.
  2. In the jar that you will be using to store the pickle, drop 8-10 pieces of chopped lemon; Sprinkle a generous amount of salt all over; Continue the process for the remaining pieces as well; Close the lid of the jar tightly and keep aside for 4-5 days. Note: Make sure you pick a jar/bottle with a lid that closes tightly.
  3. Open the lid of the jar and mix thoroughly with a steel spoon; You will see that the lemons would have given out enough water because of the salt.
  4. Close the lid of the jar tightly and keep aside for another 20 days; Remember to mix thoroughly, once in every two days.
  5. Dry roast red chilies, methi seeds and hing until you smell the fresh aroma of the masalas. Powder the roasted masalas in a blender without adding any water.
  6. Add the powdered masalas to the salted lemons and mix thoroughly; Keep aside for 2 days.
  7. Relish with dosas, rotis, parathas, idli, curd rice or just some hot steamed plain rice!

Prep Time: About 30-40 mins, excluding storage time;

Makes: Enough to fill a 500ml bottle;

Wednesday, July 15, 2009

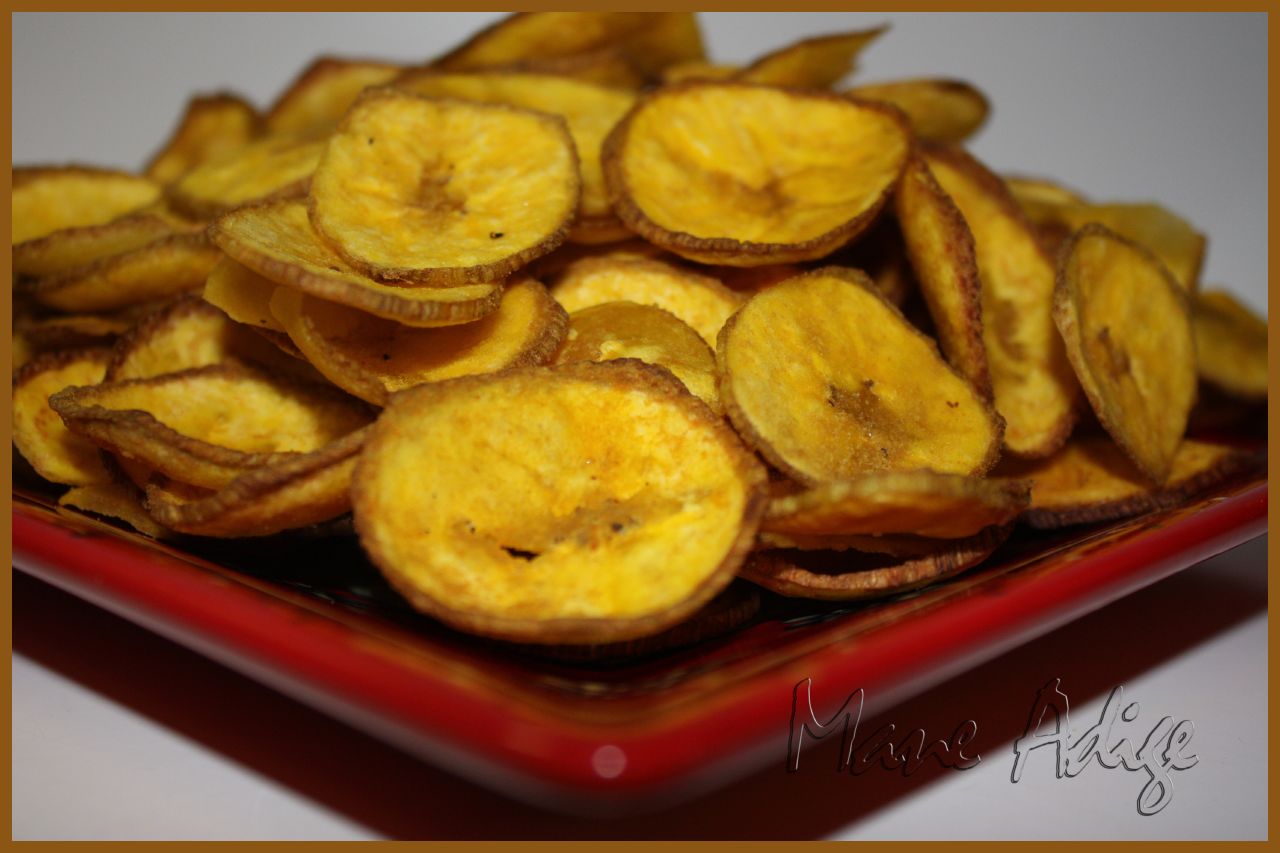
Baalekai Chips/ Banana Chips


With just about a week left for our move, mom and I are busy emptying our pantry and making sure we don't end up wasting too many groceries. In the process, we ended up making Mangalore special -Banana Chips last week.... Here goes the recipe

Am sending this across to "RCI-Udupi & Mangalorean Cuisine" event hosted by Sia of Monsoon Spice. Thanx to Lakshmi for having come up with the RCI event concept, and thanks to Sia for hosting this month's event!!

Ingredients:

1 Raw Banana (preferably the long and thick ones, called "nendra baale" in Kannada)

2-3 tsp Salt

1/4 cup Water

Oil for deep frying (Coconut oil, preferably)

Method:

  1. Wash and peel the raw banana; Peel deep enough, such that only the white pulp remains.
  2. Slice the banana into very thin circular slices. You could use a slicer for this purpose.
  3. Heat oil in a heavy bottomed pan; Meanwhile, dissolve salt in some water and keep aside.
  4. Drop a handful of banana slices into the  hot oil carefully.
  5. Pour a tsp or two of salt water into the oil; The oil will sizzle a little, so make sure you maintain a distance.
  6. Saute regularly so that the slices do not stick to each other and they are cooked all over.
  7. The chips are done when they turn golden yellow in color; Remove from oil and drain on paper towels; Let cool completely and store in airtight containers.
  8. Repeat the whole process for the remaining banana slices.
Note:
  • While adding salt water to subsequent batches, keep in mind that the oil would already have some amount of salt in it. So, you might want to add lesser quantity of salt water every time.
  • You could even add a pinch of turmeric and hing to the salt concentrate, for  good color and taste.
  • Using coconut oil gives it the authentic mangalorean taste, but feel free to go ahead and use any vegetable oil of your choice.

Prep Time: About 30-40 mins;

Serves: Makes enough for 2-3 people;

Tuesday, July 7, 2009

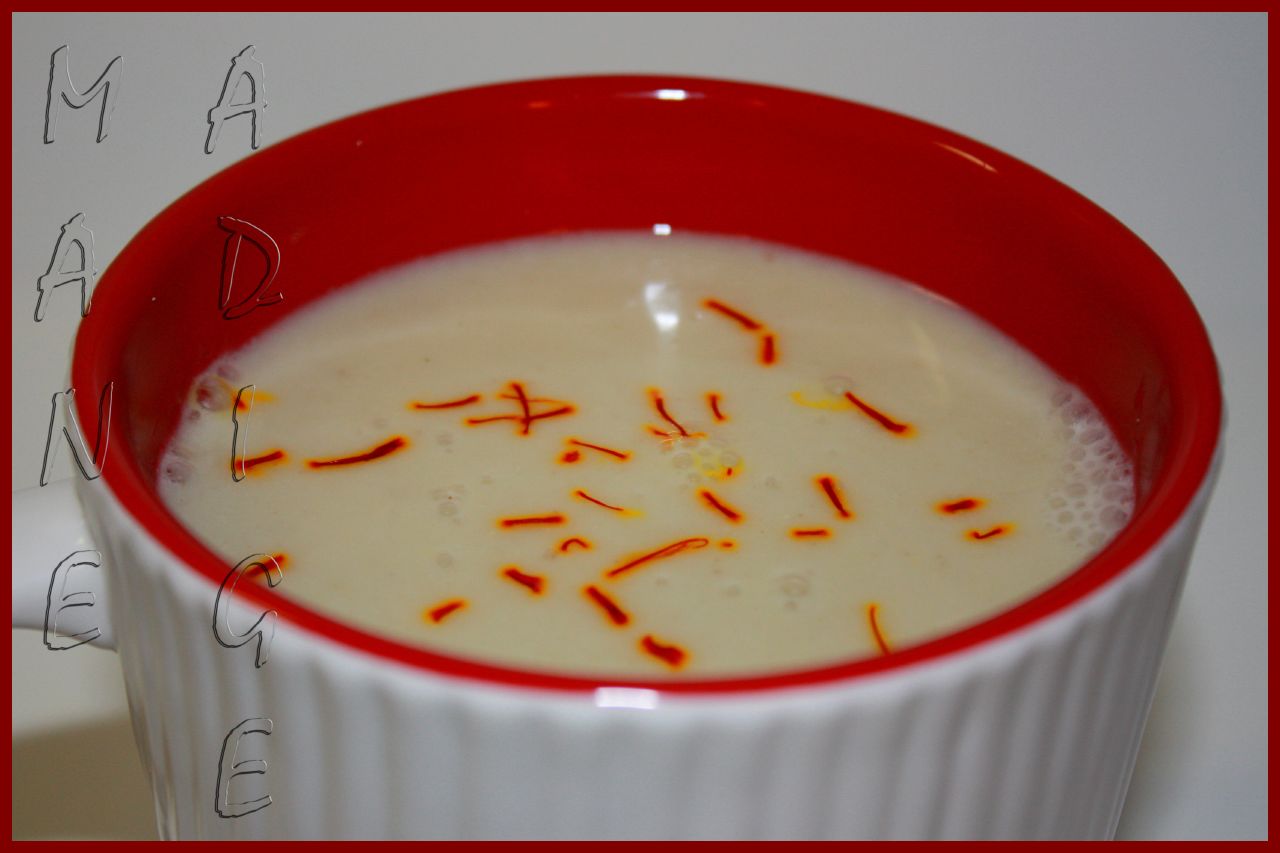
Gasagase Payasa / Poppy Seeds Payasam


Hey everybody! Hope y'all had a safe and fun filled long weekend. We spent ours at New York!! Amma Appa were awestruck by all the tall and beautiful buildings, the busy crowds on the streets, abound dining and shopping options..... They loved it all :)

And btw, have I told you guys that we are moving back to India in a couple of weeks?? In case I haven't mentioned it yet.... Naveen and I are moving back to India for good!!!! :) By the end of this month, we'd be in India among family and friends.....Oh, I am so very excited!!!! But before that, we have a whole lot of packing and winding up to do here.The next two weeks are gonna be really busy!!! In the next couple of months, I may not be able to blog as regularly as I would want to... But I'm sure you folks will understand! :)

Anyway, coming to today's recipe... Gasagase Payasa is very traditional and authentic to Karnataka. As most of you would know, poppy seeds are the source of opium. So, don't be surprised if you find yourself dozing off after having a hot cup of Gasagase Payasa :D. There are different ways of making Gasagase Payasa..... some people soak the rice and poppy seeds, while some others roast and powder it. Here's how we make it in our family....

Ingredients:

4 tsp Poppy seeds

1 tsp White Rice, uncooked

1 cup Grated Coconut, fresh/frozen

1/4 cup Desiccated coconut/Copra/Kobbari

3-4 tbsp Jaggery

1/4 cup Milk

1/2 tsp Elaichi, powdered

4-5 strands of Saffron (optional)

8-10 Cashews/Almonds (optional)


Method:

  1. Dry roast poppy seeds and rice until they turn crisp and lightly change color.
  2. Finely powder the roasted poppy seeds and rice in a blender without adding any water.
  3. Add  grated coconut, desiccated coconut, some water and grind to a  smooth paste.
  4. Add half a cup of water and strain the paste through a finely perforated strainer; Retain the liquid - this will  make the payasam later.
  5. Transfer the coarse residue into a blender; Add some more water and grind again to a smooth paste.
  6. Repeat steps 4 and 5 about 3-4 times.
  7. Add jaggery to the strained liquid and boil on low-medium heat until all the jaggery dissolves; Remove from stove.
  8. Dissolve saffron strands in 1/4 cup of warn milk and set aside for 5-10 mins.
  9. Add powdered elaichi,warm milk with saffron and mix well; Serve hot and relish.

Prep Time: About 40-45 mins;

Serves: About 3-4 people;

Monday, June 1, 2009

Aviyal

Aviyal, as most of you would know, is a Kerala speciality dish. Dakshina Kannada (Mangalore-Udupi) cuisine is highly influenced by Kerala cuisine because of its proximity to Kerala. Aviyal is one such adaptation. While Aviyal is made thick and "sabzi/palya" kinds in Kerala, it is more of a gravy in Karnataka. With a whole lot of veggies, this dish is healthy, nutritious and quite easy to make! Serve with some hot steamed rice and it makes a wonderful comfort food.

Ingredients:

2 cups Mixed veggies, chopped into 1" pieces (green beans, carrots, tindora, potatoes etc)

1/2 cup Grated coconut, fresh/frozen

1 cup Yogurt/Sour curd

2-3 Green Chilies, low to medium spiced

1 tsp Jeera

1-2 tsp Oil

1 tsp Mustard seeds

4-5 Curry leaves

A pinch of Hing

Salt as per taste

Method:

  1. Boil the veggies with some salt and water until tender and cooked; Drain the cooked veggies and retain the excess water.
  2. Grind coconut, jeera and green chilies to a smooth paste with some water.
  3. Add the masala paste to the cooked veggies and boil for a minute; Add salt and mix well.
  4. Switch off the stove and add yogurt; Add some of the retained water from the cooked veggies to get the desired consistency; Mix well and adjust ingredients according to taste.
  5. Temper with mustard seeds, curry leaves and hing; Serve with hot steamed rice and relish.


Wednesday, May 20, 2009

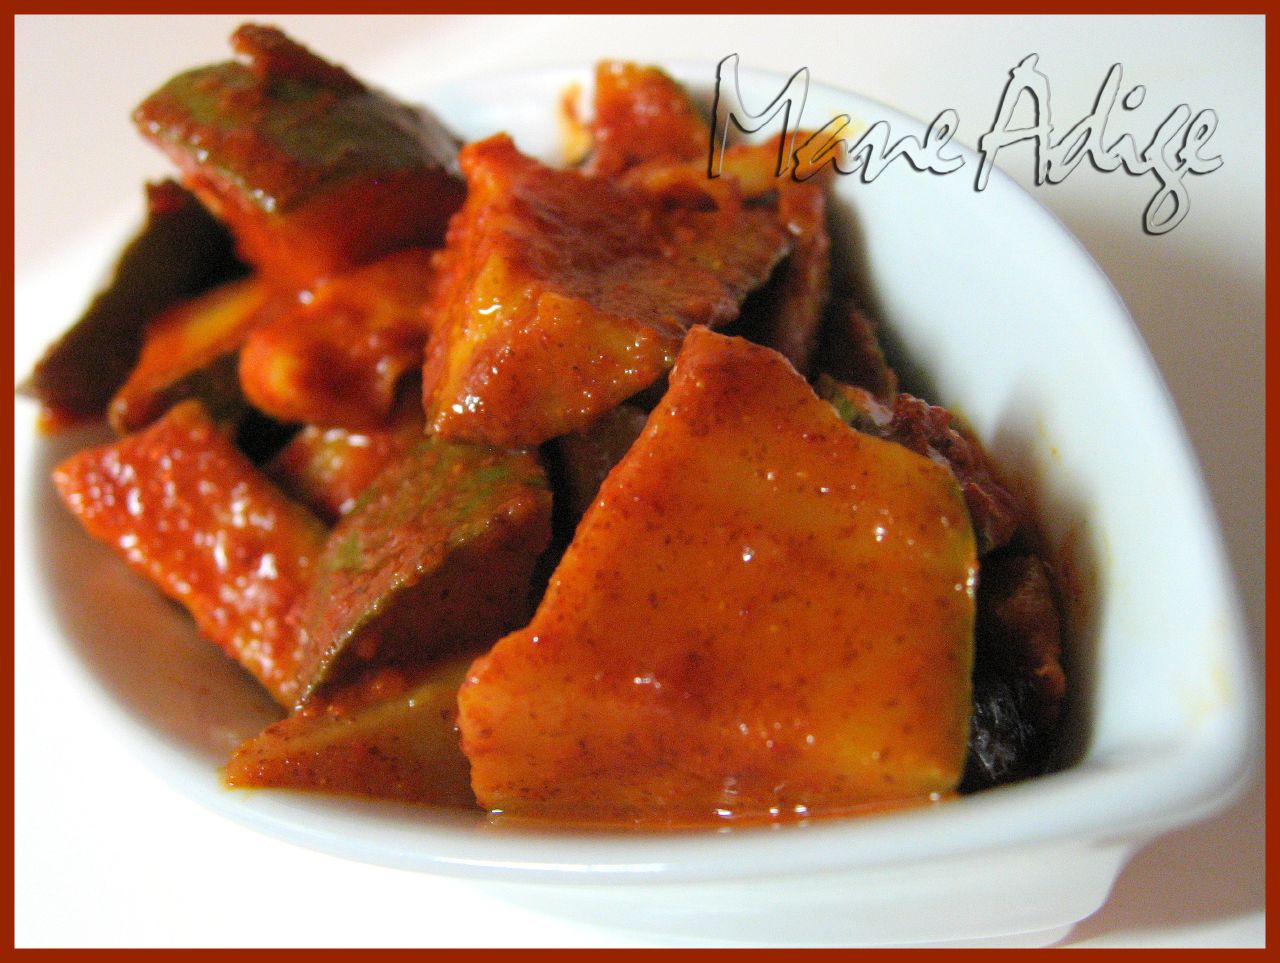
Maavinakai Kette Uppinakai (Instant Raw Mango pickle)


Pickles are something that everyone loves!!!!  As a child, I would have pickles with almost everything - idlis, dosas, plain rice & ghee, rotis or even bread!! :D And we always had a jar of home made pickles at home. In fact, I hadn't tasted store bought pickles until I shifted to the hostel during my Engineering days!! Amma makes different varieties of pickles and the one I have for you today is the simplest of all. Its fast, easy to make, takes very few ingredients and you need not have to wait for too long before you can start relishing it.... And it is also one of my favorites!!! :) Here's how Amma makes it....

Ingredients:

3 Raw Mangoes, medium sized

3tsp Mustard seeds

30 Dry Red Chilies, low to medium spiced

1tsp Powdered Hing

1 tsp Haldi/Turmeric

Salt as per taste


Method:

  1. Wash and cut mangoes into 1 inch cubes; In a glass jar, spread some of the cubes and sprinkle some salt over it; Add few more cubes and make another layer; Sprinkle some more salt ; Repeat the process for the remaining mango cubes and keep aside.
  2. Powder the mustard seeds and red chilies to a fine mixture; Add hing, turmeric and mix well. Note:DO NOT add any water while powdering the spices in the blender/mixie.
  3. Add the powdered spices to the mango-salt mixture and mix well with the help of a long spoon; Close the lid of the jar tightly. Relish with idlis, dosas,akki rottis, curd rice.

Tips:

  1. Choose mangoes carefully; The mangoes should be sour and hard.
  2. The pickle may seem a little dry on the first day, but DO NOT add any water; the mangoes will give out enough water in a day or two;
  3. Though this pickle can be eaten with any south indian dish, curd rice & pickle is the most famous combination.
  4. Though this pickle is sort of instant and can be used right away, it tastes great after a couple of days when the mangoes would have absorbed the masalas.
  5. This pickle cannot be stored for too long; Its average shelf life is about 1-1.5 months. As days go by, the mangoes would start becoming soft and start dissolving in the gravy.

Prep Time: About 30-40 mins;

Makes: Roughly enough pickle to fill a 450-500 ml bottle;

Tuesday, March 10, 2009

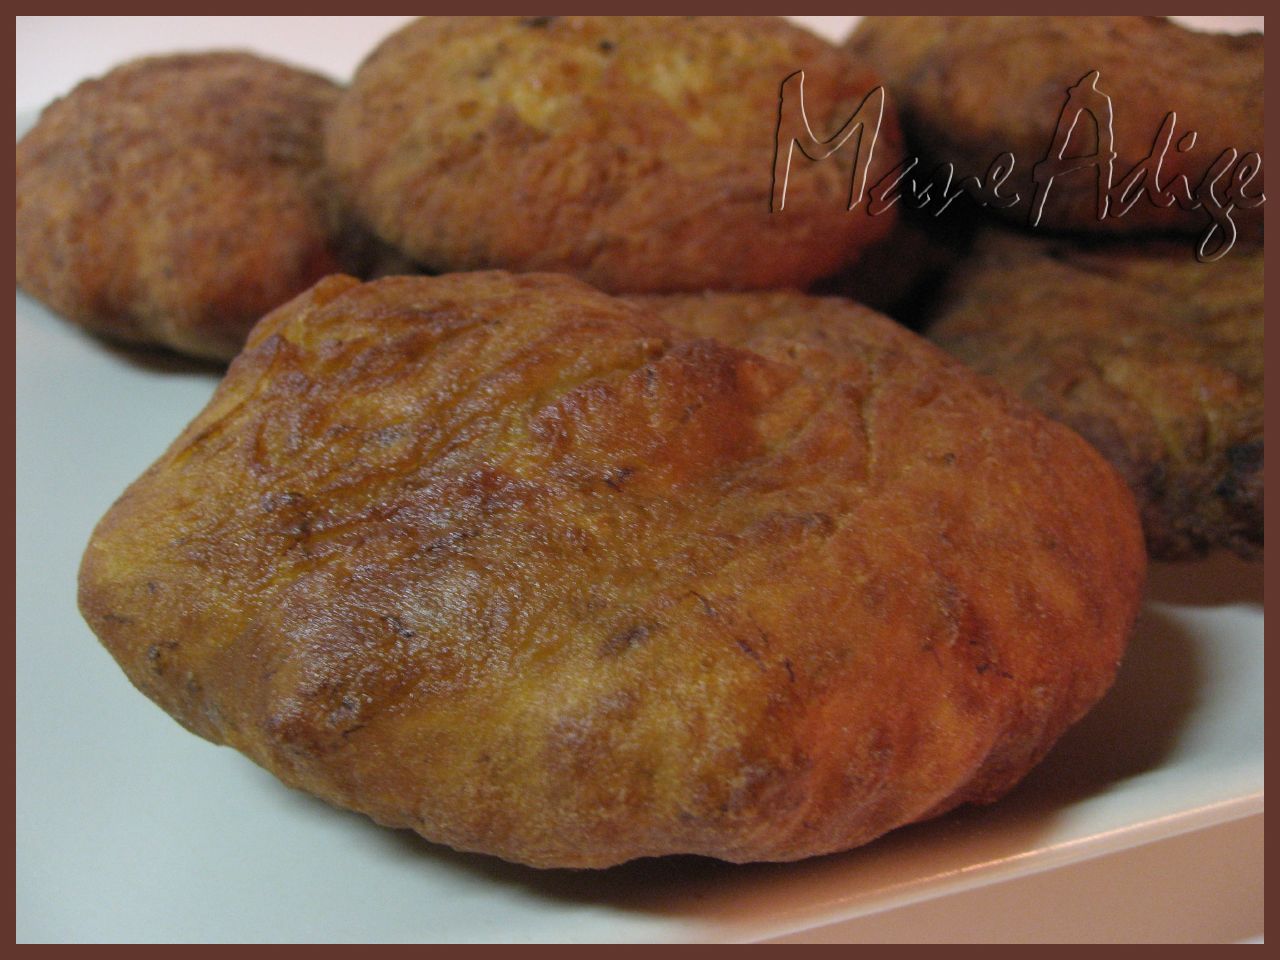
Mangalore Buns


I was quite young when I heard of this dish for the first time, and I wondered.... "Why is it called buns?? why not pakoras or bhajjis or something?? Its nothing like the actual buns...!!!!"  Initially, I found this whole "Mangalore Buns" thing pretty strange, 'coz it was not actually buns, it was only mildly sweet (neither was it a savory, nor was it exactly a sweet dish - and I was told that's how its supposed to be), and its eaten with chutney!!!!!!! I thought i'd never get myself to like something this different. But after trying it a couple of times, I actually started liking them. These mildly sweet, banana flavored, deep fried treats indeed taste great with a spicy chutney!!!  They are different.... You should try it sometime, if you still haven't.

As the name suggests, this is an authentic Mangalorean recipe. Scan the menu of any local restaurant in Mangalore and you are sure to find "Buns" on it. While I like my buns with coconut chutney and a hot cup of tea, they can also be had with some steaming hot sambhar. I am posting this on the request from a few of my readers. Sorry about the delay, people... But I hope y'all like the recipe! :)


Ingredients:

1 cup Maida/All purpose flour

1 ripe Banana, medium sized

1-2 tbsp Curd/Yogurt

4-5 tsp Sugar

1 tsp Jeera seeds

1/2 - 3/4 tsp Baking soda

1/2 tsp Salt

Oil for deep frying

Method:

  1. Mash the banana completely with your hands; Add the rest of the ingredients, except oil, and make a dough; The dough should be of the chapati dough consistency. Note: Be very careful while adding yogurt; Yogurt gives out some water and tends to make the dough watery. So, start with very little quantity and then add more, as required.
  2. Cover and set aside for 4-5 hours.
  3. Heat oil in a frying pan on low-medium heat; A tiny ball of dough dropped into the oil should rise immediately - That's when the oil is ready.
  4. Pull out ping pong sized balls of dough and pat them in between your palms to make pooris out of the dough; You could also use rolling pin to make the pooris. Note: If you are using your hands for making pooris, greasing them with a few drops of cooking oil would help.
  5. Drop the pooris in oil and deep fry on both sides until they turn brown; Note: While deep frying, press and keep them inside the oil for a few seconds, just like how you would do for ordinary pooris - This helps them fluff up!
  6. Remove from oil and drain on paper towels; Serve hot with coconut chutney/Sambhar and enjoy.

Tuesday, December 30, 2008

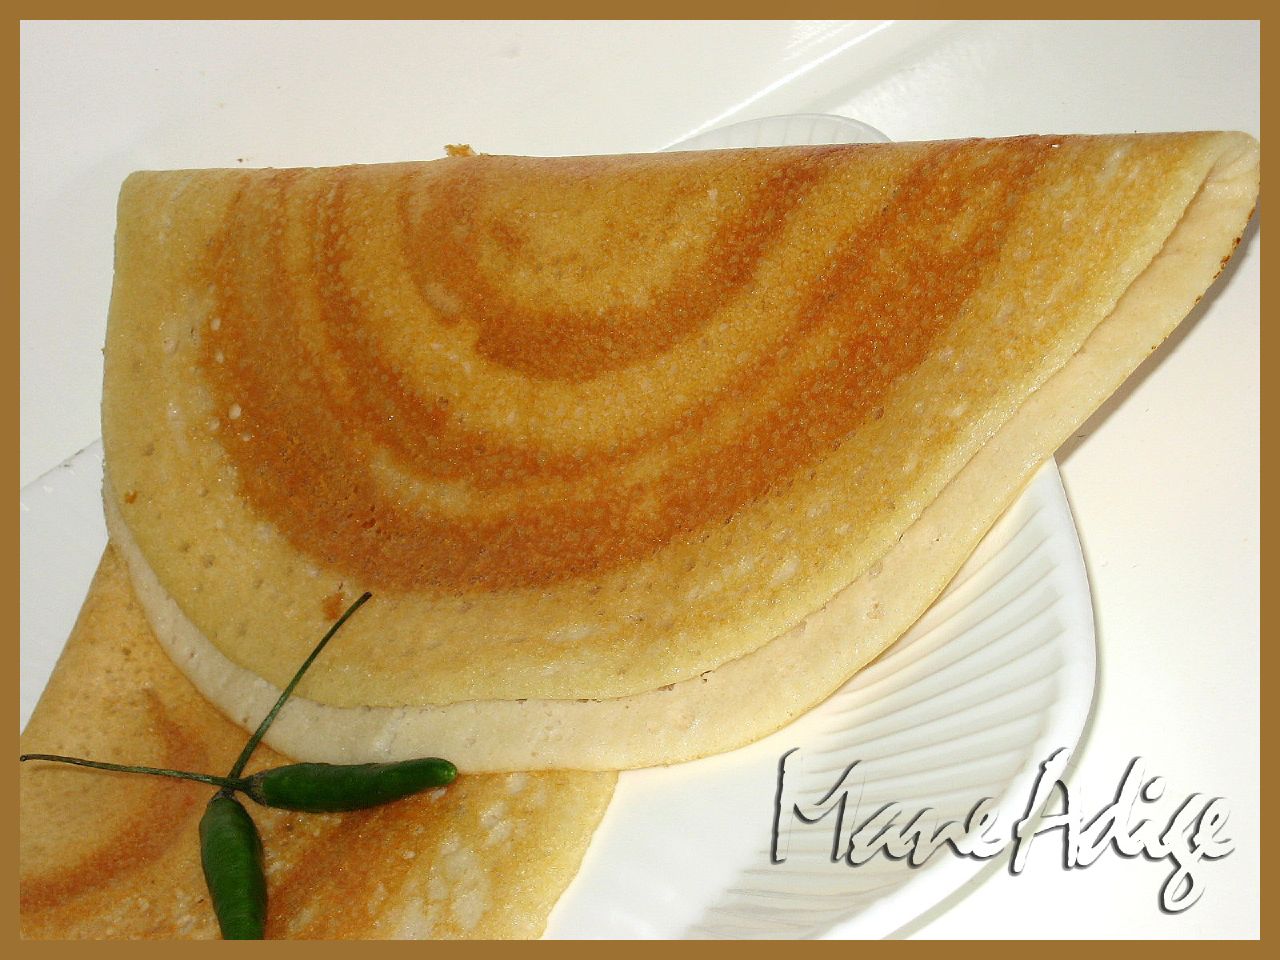
Paper Plain Dosa

This post has been looooooong due!!! I have been postponing it for over a year now. A whole lot of people have been mailing and asking me for the traditional dosa recipe. Well, in the "traditional" method there wasn't much of a difference between dosa and idli batter. The only 2 ingredients used were urad Dal and rice. While dal and rice were added in the proportion 1:2 for idli, 1:3 was the proportion for dosas. Since they are so similar, I remember my grand mom making one common batter for both dosas and idlis.

Back then, dosas weren't made crisp and "paper" like... they were thick and soft. However, things have changed in the last few years. Everyone likes the crisp,thin, golden brown, "hotel-like" dosas these days. Ingredients have changed accordingly, as well!!! My mother used to make one of the best dosas in our neighborhood. One of my friends was over at our place for breakfast one day, and Amma had made dosas for us. The very next day, we get a call from my friend's mother asking for my mother's recipe!! :D That's how good her dosas were. Though my dosas haven't gotten to that level, mine come out pretty well too. Thanx to my mom's recipe.... I barely go wrong!!

Ingredients:

1 cup Urad Dal

3- 3 & 1/4 cups Rice

1/4 cup Chana Dal

2-3 tbsp Methi Seeds

2-3 tbsp Poha, thick

1 tsp Ghee/Butter/Oil for each dosa

Salt as per taste

Method:

  1. Soak the dal, rice, methi seeds and poha with enough water for at least 4-6 hours or overnight.
  2. Grind the soaked ingredients with enough water to a very smooth paste; But keep in mind not to add too much water and make the batter running.
  3. Allow batter to ferment in a warm place for about 8-10 hours; Make sure the container has enough room for the batter to rise.
  4. Add salt to the fermented batter and mix well.
  5. Place a non stick griddle on medium heat; Once hot, pour a ladle full of batter at the center; With the back of the ladle, spread the batter thinly; Start from the center and work outwards, in a fast circular motion; Note: Spread the batter as soon as you pour it on the griddle; The batter will start getting cooked other wise and stick to the ladle, if you try spreading it after a while.
  6. Pour few drops of ghee/oil all over the dosa and also at the edges; Let cook on medium heat until it turns golden brown in color.
  7. Remove from griddle and serve immediately with coconut chutney, sambhar, kurma, saagu or any other side dish of your choice.

Prep Time: About 15-20 mins for grinding and 2-3 mins for cooking each dosa;

Makes: about 10-12 dosas;

Tips:

  • Keeping the batter as thick as possible, would make your dosas very crisp; So, add water according to the crispness you require.
  • Keep in mind not to add ay extra methi; If the quantity of methi is too much, the dosa becomes bitter and it even ends up sticking to the griddle while cooking.
  • If you want the dosa to remain crisp, cook only on one side. Cooking on both sides would make it a little soft.
  • Covering the dosa with a lid while it cooks makes it soft; So avoid doing so, if you want crisp dosas.
  • For the batter to be well fermented, you might want to keep it in a warm place like - inside a MW oven or even the conventional oven, overnight.

Monday, December 15, 2008

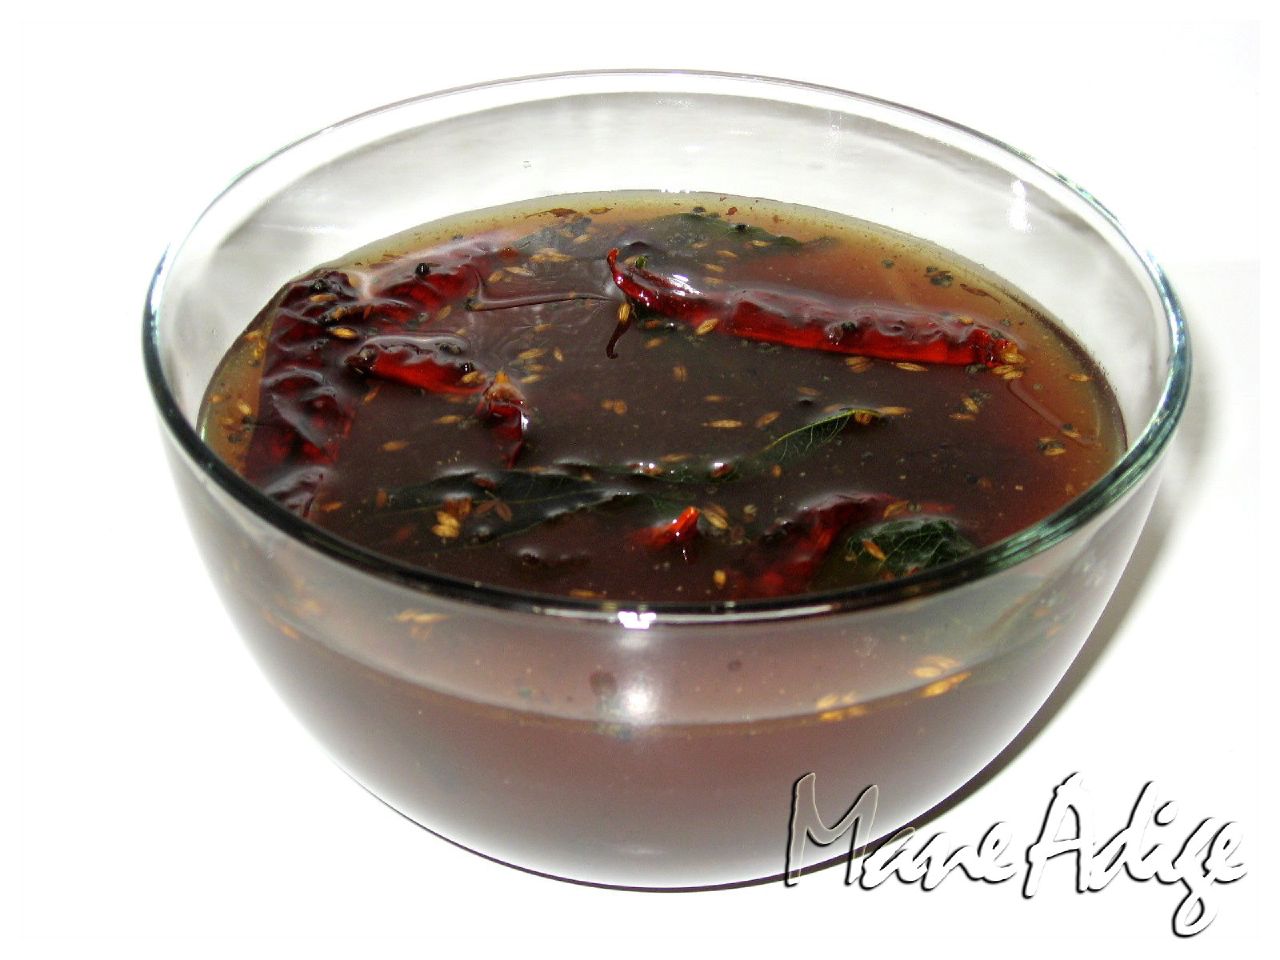
Punarpuli Saaru/ Kokum Rasam

I was at the local Indian store couple of weeks back, doing my weekly groceries. I picked up a pack of SWAD toor dal from there; When I was emptying the dal into a container at home, I realized that it smelled bad.... like something bitter. "Old stock, maybe" I thought and ignored it.... noting in my mind to wash the dal one extra time before using it. I made  sambhar out of the same dal the next day- I washed it a couple of times extra, just like I had noted. I served myself some rice and sambhar for lunch, and I couldn't believe how it had turned out!!! It was bitter, and it smelled bad.... It tasted nothing like sambhar!!! I tried SWAD toor dal from a lot of places after that, but they all tasted bad. I was wondering if any of you have had similar experiences with toor dal from your local grocery stores?!?!?!!!!

Anyway.... ever since the "smelly dal" episode, I have been looking for dal-less recipes. Here is one such recipe- "Kokum Rasam". Kokum, known as punarpuli in Kannada, has many medicinal values. Read more about Kokum here. Punarpuli rasam is a traditional mangalorean recipe. Its fast, easy to make and healthy too!!! Here is the recipe....


Ingredients:

7-8 Kokum, Wet/Dry

1 tsp Jaggery

1/2 tsp Mustard seeds

1/2 tsp Cumin/Jeera

3-4 Dry red chilies, low to medium spiced

4-5 Curry Leaves

1-2 Garlic flakes (optional)

1-2 tsp Ghee/Oil

A generous pinch of Hing

Salt as per taste


Method:

  1. Add enough water to the kokum and boil well, for about 7-10 mins; If you are using dry kokum, soak it in water for about 30-40 mins before boiling.
  2. Add salt, jaggery and boil further for a couple of more minutes; Adjust ingredients according to taste; Add extra water if the rasam turns out too strong and tangy.
  3. Heat ghee in a pan and temper with mustard seeds, jeera, curry leaves, garlic, hing and red chilies; Serve hot with steamed rice and enjoy!

Tip: This rasam could also be had as is, like a soup!


Tuesday, November 25, 2008

Heerekayi Bajji/ Sambandha (Chinese Okra chutney)


Did you expect to see some kinda pakoras or deep fried savories here, when you heard the name "Bajji"??!?! :) Sorry to have disappointed you, but this Bajji is more like a chutney or a thick coconut based curry that is served as a side dish with hot steamed rice, dosas, idlis or even rotis.

This traditional Brahmin dish is called "Bajji" in the Mysore-Bangalore and Sirsi-Sagar regions of Karnataka and "Sambandha ( or Sammandha)" is what it is known as, in the Mangalore-Udupi regions!! The speciality of this kind of chutney is that it can be re-heated and boiled without much of a change in its taste.

While I have used Chinese Okra ( Heerekai, in Kannada) here, you could also use methi leaves, snake gourd, beetroot, carrots etc.

Ingredients:

1 cup Chinese Okra/Heerekayi, chopped into 1" chunks

2 tsp Til/Ellu/Sesame seeds (I use the white ones)

1/2 cup Grated coconut, fresh/frozen

4-5 Dry Red Chilies, low spiced

1 tsp Urad Dal (Optional)

1/4 tsp Tamarind paste

1/2 tsp Jaggery

2 tsp Oil

1/2 tsp Mustard seeds

3-4 Curry leaves

A pinch of Hing

Salt as per taste

Method:

  1. Cook the Veggie chunks with some salt and water until done.
  2. Dry roast the sesame seeds, red chilies and the urad dal until they turn golden brown in color.
  3. Grind the roasted masalas with coconut, tamarind, salt and jaggery to a smooth paste; Add the cooked veggie and pulse a couple of times until well blended.
  4. Temper with mustard seeds, hing and curry leaves; Serve with steamed rice (and a spoon of ghee or coconut oil), dosas, idlis, or even rotis.

Prep Time: About 15-20 mins;

Serves: About 2 people;

Variation:

  • Instead of adding tamarind, you could add some beaten yogurt, for the tanginess, and make a gravy out of the dish; Serve with hot steamed rice.
  • You could also use green chilies instead of dry red chilies to get a slightly different flavor and color.

Wednesday, November 19, 2008

"Kashi Halwa for Deepavali!" Well, now for Thanksgiving maybe.... :)

As most of you would have guessed, this post was meant to be for Deepavali!! It has been lying in my drafts folder for almost a month now.... But it somehow didn't make it to my page before Deepavali :(

P.S: The delay had nothing to do with me being lazy and not getting a picture of the dish, before relishing it right out of the cooking pan!! :D :P :)

Had this post made it on time, here's what I would have said.....

"A Very Happy Deepavali to all Mane Adige readers!!!! Here's hoping that the festival of lights brings your way, bright sparkles of contentment, that stay with you today and in the days to come!

As you all know, the speciality of Deepavali festival (apart from the fireworks, of course :)...) is the multiple varieties of sweetmeats prepared in every household. Unlike other festivals, where the main focus is on worshiping God, Deepavali is a people oriented festival. It is the time for enjoyment.... It is the time when people forget enmity and join hands, back in friendship!".

But now, I'd just say, Hope you all had a wonderful Deepavali!!! :)

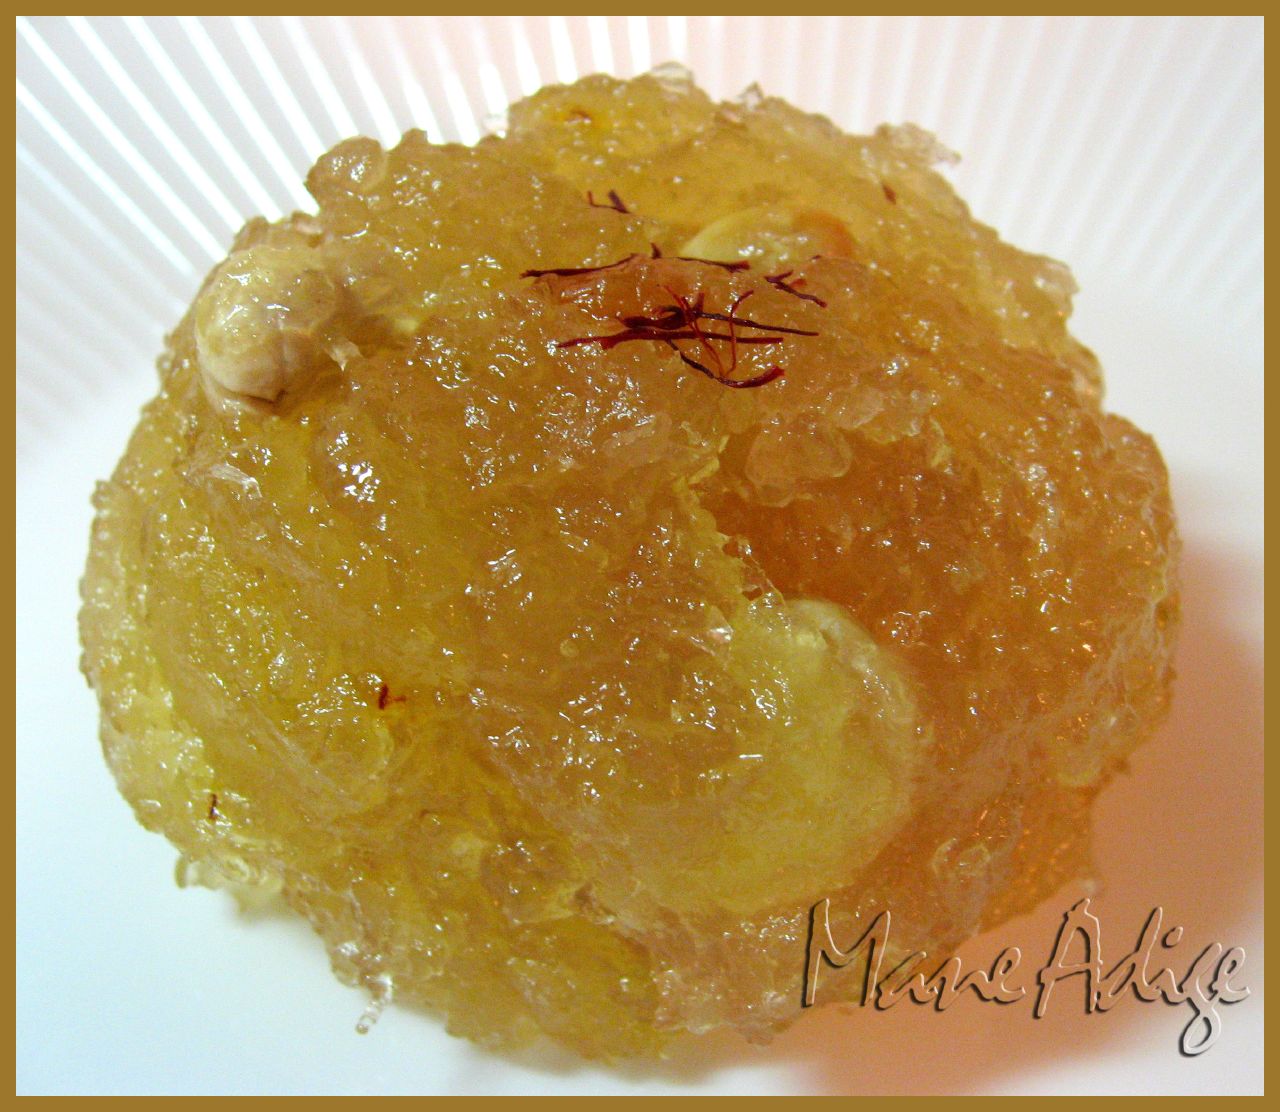
Kashi Halwa is an authentic Karnataka speciality sweet dish that is made with Ash Gourd (Also known as Winter melon in English and called Boodkumbalakai/ Kumbalakai in Kannada). Kashi Halwa is usually made during special occasions like weddings and festivals. How did the dish get its name?!?? I am clueless!!! Any info regarding the name would be much appreciated!! :D

There are two ways of making this Halwa

  • Cook the winter melon with milk, just like how we make Carrot Halwa
  • Cook the winter melon without adding any milk - This is the version I have for you today.

While both the versions are famous, I personally prefer the one with no milk. You could go ahead and choose whichever suits you best!! Happy Thanksgiving!!!! :)

Ingredients:

2 - 2 1/2 cups Grated Winter melon/Ash gourd/ Boodkumbalakai

1.5 cups Sugar

4-5 strands of Saffron

1/2 tsp Elaichi/Cardamom powder

1 tbsp Raisins/Cashew mixture

2+2 tsp Ghee/Clarified butter

Method:

  1. Drain out excess water from the winter melon; Heat 2 tsp ghee in a pan and roast the grated winter melon until it is coated well with ghee.
  2. Pressure cook the grated winter melon for 1-2 whistles, or until cooked completely.
  3. Transfer the contents to the pan and cook on medium heat until all the excess water evaporates; Saute regularly.
  4. Once the quantity is reduced to three fourth's, add sugar and mix well;
  5. Cook further, until all the moisture evaporates and the winter melon comes out as a single lump; It usually takes about 40-50 mins; Saute frequently towards the end.
  6. Add elaichi, saffron and mix well.
  7. Roast raisins and cashews in ghee and add to the halwa. Serve hot and enjoi!

Prep Time: About 90 minutes;

Serves: About 1-2 people;

Off this goes to Aparna for her Blog Anniversary Event celebrations... Congratulations, Aparna and thanx so much for hosting!! :)

I am also sending this across to Mythreyee of Paajaka Recipes for the Sweet series- Halwa/Katli/Burfee/Peda Event that she is hosting. Thanx so much, Mythreyee!!


Friday, October 31, 2008

Rave Unde/ Rava Laddu


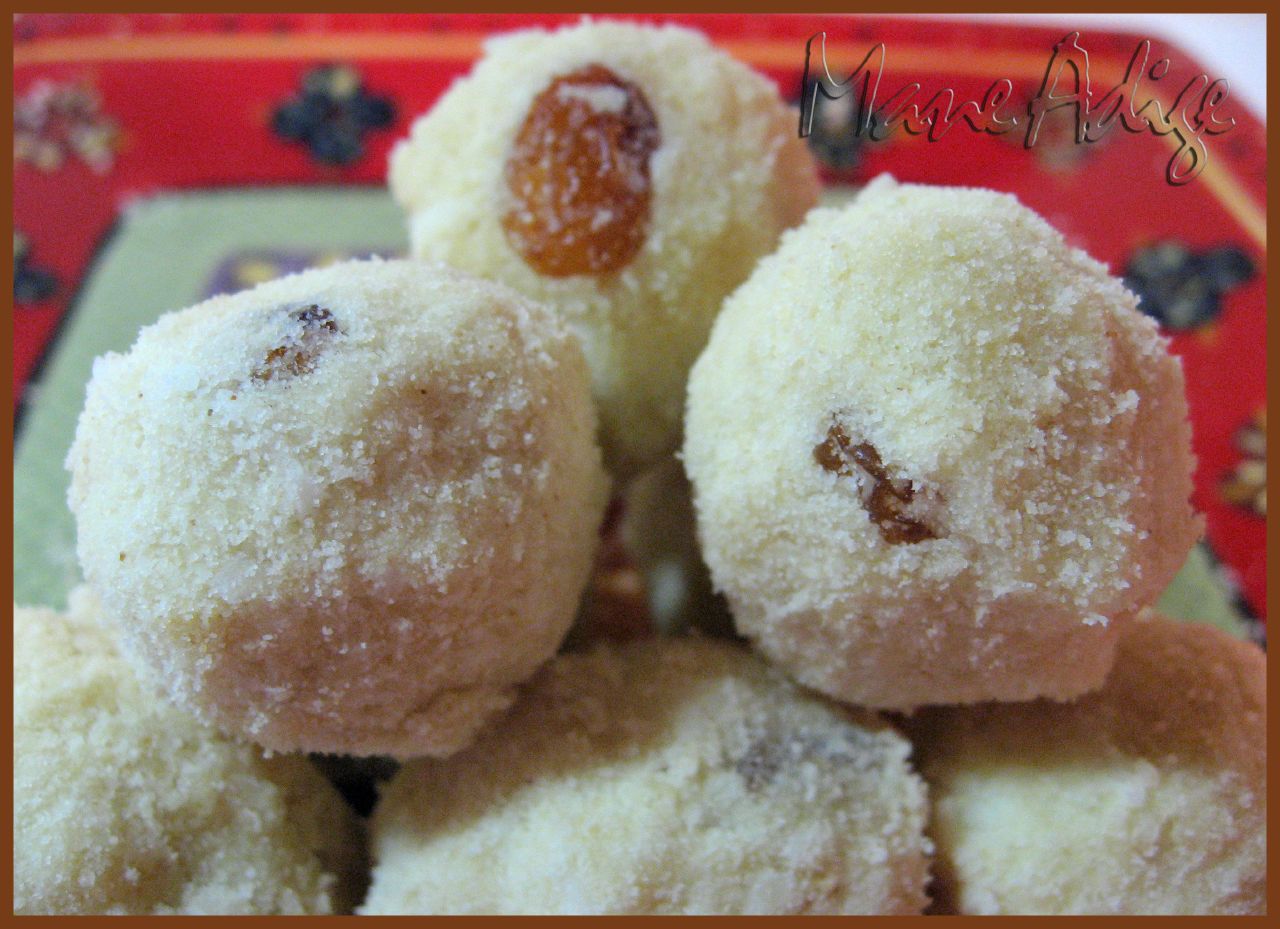
This one needs no introduction! Rava laddu belongs to all cuisines, from all  over India. This is one of the easiest sweet dishes to make and takes very little time.... And needless to say, one of the tastiest as well!!  Will head straight to the recipe, without wasting any more time...

Ingredients:

1 cup FINE Rava/Sooji

1.5-2 cups Powdered sugar

1/4 cup Desiccated coconut/Grated Copra

2-3 tbsp Ghee

1 tsp Raisins

1 tsp Cashews/Almonds, chopped


Method:

  1. Heat ghee in a pan and roast the raisins and cashews until they turn golden brown.
  2. Add the fine rava and roast well until the raw smell disappears; Saute continuously and make sure the rava does not get burnt.
  3. Let cool for just a minute or two; Add few spoons of water to the rava- just enough to get the rava damp; Form a lump and set aside for a minute or two, so that the water gets absorbed.
  4. Add powdered sugar and desiccated coconut while the rava is still warm and mix well; Adjust sweetness according to taste. Adding the sugar when the rava is still warm, would melt the sugar a little and make the mixture a little sticky.
  5. Take 2-3 spoons of the mixture and mould them into small laddus with your hands; Cool completely and store in air tight containers.

Note:

If the rava mixture is too dry/ brittle and you are not able to mould them into laddus, you could go ahead and add a few drops of milk to the mixture. However, adding milk would make the laddus a little hard... So, you might wanna avoid it as much as possible!! :)


Monday, October 6, 2008

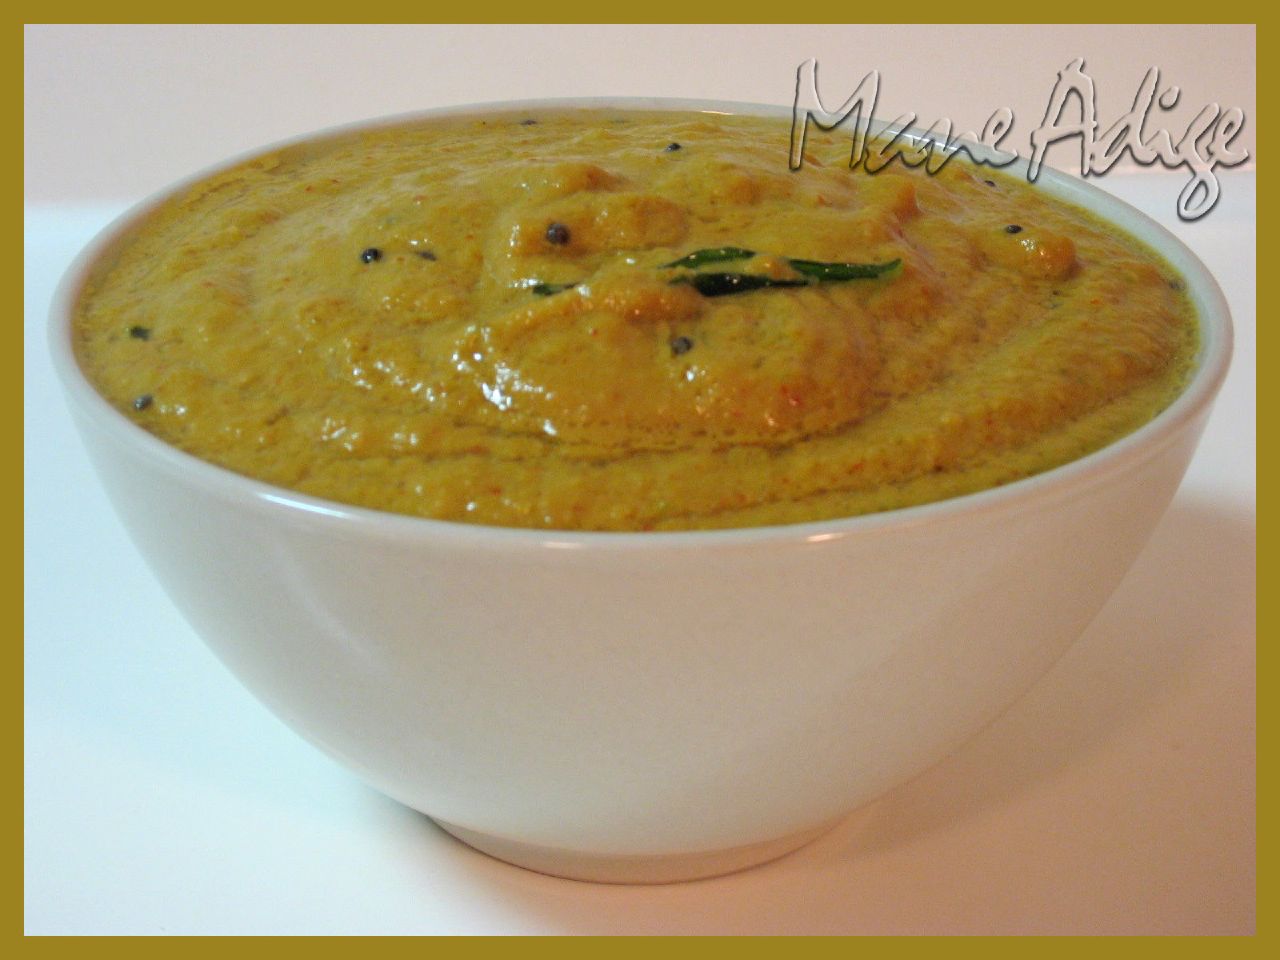
Maavinakai Chutney / Raw Mango Chutney


Off late, I have been picking up a lot of mangoes from the grocery store and I have been cooking with them almost every other day. Appe Huli, Menaskai, Chitranna, Gojju, Rasaayana.........It's like Mango fiesta at our home!!!! Here's another addition to the collection of Mango dishes on Mane Adige : Raw Mango Chutney! This chutney is very simple to make and goes really well with idlis, dosas, rice and even rotis. You could even use it as a spread for sandwiches. Enjoi!!

Ingredients:

1 Raw Mango, peeled and grated

1/2 cup Grated coconut, fresh/frozen

1.5-2 tsp Methi seeds

3-4 Dry red chilies, low spiced

A generous pinch of Hing

2 tsp Oil/Ghee

1 tsp Mustard seeds

3-4 Curry leaves

1-1.5 tsp Peanuts

1 tsp Urad-Chana dal mixture

Salt as per taste

Method:

  1. Dry roast the red chilies, methi seeds and hing for about a minute and powder them in a blender.
  2. Keep aside a couple of tbsp of grated mango and grind the rest with coconut and the spice powder from step 1; Add just enough water to make a coarse paste.
  3. Heat oil in a pan; Temper with mustard seeds and curry leaves; Add peanuts and the dal mixture and roast until they turn lightly brown.
  4. Add the grated mango that was kept aside in step 2 and fry for a minute; Saute continuously.
  5. Add the mango-coconut paste and boil for another minute;  Add few spoons of water to get the desired chutney consistency.
  6. Add salt as per taste and mix well; Remove from stove and serve with idlis, dosas or even rotis.

Prep Time: About 15-20 mins;

Serves: About 3-4 people;

Note:

  • If the mango is not sour enough, some lemon juice could be added to get the desired tanginess. Similarly, if the mango is not sweet enough some jaggery or sugar could be added.
  • If boiled well and refrigerated , this chutney could be preserved and relished for almost 12-15 days.
  • If you do not like finding pieces of grated mango in your chutney, you could go ahead and grind the entire mango, in step 2.