About Mane Adige

My photo
"Mane Adige" means "Home Food" in kannada and this blog is all about recipes that I cook. Most of the recipes I post here will be from "Mangalooru" and "Bengalooru " regions of Karnataka,India. Rest of them are the one's which I try out by improvising the recipes got from different sources.
Showing posts with label Lunch/Side dish. Show all posts

Monday, January 10, 2011

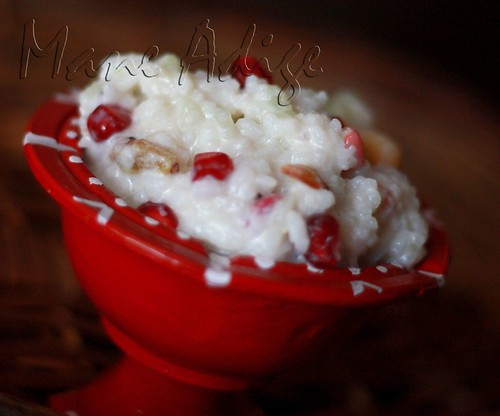
Mosaranna/Curd Rice


No South Indian meal is complete without some curd rice at the end. In its simplest form, it is just some rice mixed with a little yogurt and served with some pickle. However, let your imagination flow…. Add whatever you think would taste good – fresh fruits, dry fruits, nuts… anything! Here is how I usually make it.

Ingredients:

1 cup White rice – I like mine to be mushy and well cooked

1 cup Yogurt/Curds

¼ cup Red onions, finely chopped

¼ cup Cucumber, finely chopped

½ cup chopped fresh grapes + pomegranate

3-4 strands Cilantro, finely chopped

Salt as per taste

For Tempering:

2 tsp Oil

1 tsp Mustard

3-4 Curry leaves

1 tsp Chana dal

1 tsp Urad dal

2-3 nos Chilies , Dry red or Green ones- chopped into pieces

1 tsp Ghee

1-2 tbsp raisins + cashews

Method:

  1. Mix all the ingredients in a large mixing bowl; Add water to get the desired consistency; adjust ingredients according to taste.
  2. Heat ghee in a pan and roast raisins and cashews for a minute or until they turn lightly golden in color; add to the curd rice mixture and mix well.
  3. Temper with the mustard, chana dal, ural dal, curry leaves and chilies; Serve chilled towards the end of the meal

Prep Time: About 15-20 mins;

Serves: About 2-3 people;

Tuesday, December 28, 2010

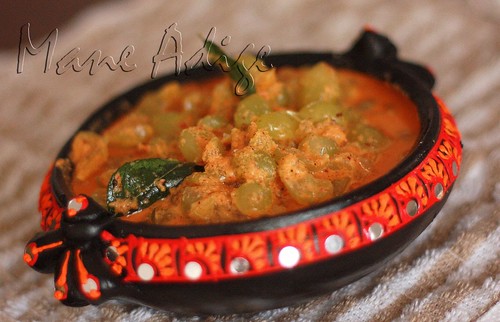
Drakshi Saasive/Fresh Grapes in Coconut & Mustard Sauce


So, I got  this pack of fresh green grapes from the store over the weekend. I was actually picking up some grapes after over a year.... While Aadi was an infant, his ped had asked us to keep him away from grapes for a  little while so he wouldn't catch any cold and cough. And now that he's a year old, I thought it would be a good idea to introduce them to him. But to my disappointment, the grapes were so sour that they weren't good for even juices :(

My mother in law  is great with innovative recipes and  using up left overs. So I picked up the phone and called her up to see if she could suggest something with the sour grapes that I had in hand.  She  suggested I make Saasive- an instant Mangalorean dish that needs no cooking on the stove top and takes very few ingredients. With just red chilies and mustard as spices, it was amazing how flavorful the dish had turned out! Definitely worth  a try and its just right for when you need a change from the usual .

Ingredients:

1 cup  Fresh grapes (I used the green ones, you could use the black variety as well)

1/2 cup Grated coconut, fresh/frozen

3-4 Dry red chilies, low-medium spiced

1/4 tsp Tamarind paste (optional)

1/2 tsp Jaggery (optional)

1.5 tsp Mustard

2 tsp Oil

1 strand Curry leaves

A pinch of Hing

Salt as per taste


Method:

  1. Wash and slit each grape in the center and keep aside.
  2. Grind coconut, red chilies , tamarind, jaggery and salt to a smooth paste with some water; Towards the end, add half a tsp of mustard and pulse a couple of times.
  3. Add the ground masala paste to the grapes and mix well; Add water to get the desired consistency; Adjust ingredients according to taste.
  4. Temper with mustard, hing and curry leaves; Serve immediately with hot steamed rice and relish!

Tip:

  • While grinding mustard with the other masalas, keep in mind that adding too much mustard will make your dish bitter; So add just a little of it towards the end.
  • If your grapes are really sour, you might wanna do away with tamarind altogether, like I did with mine this time; Or if your grapes are sweet, you might wanna let go of jaggery!

Variation: Instead of grapes, you could also use cucumbers,pineapple or  mangoes.

Prep Time: About 10-15 mins;

Serves: About 2-3 people;

Friday, December 3, 2010

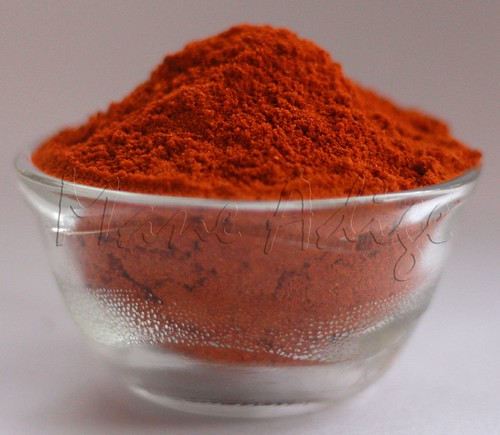
Rasam Powder/ Saarina Pudi/Menasina Pudi


Rasam powder, THE KING of all masalas, is the most essential ingredient in any South Indian pantry. This basic South Indian masala is used in several other dishes like Avarekai Sambhar (grind 2-3 tsp of rasam powder with coconut and use as an alternate masala), Avalakki upkari, Tomato Gojju, Puliyogare Gojju (Recipe coming soon!), Punarpuli Rasam, Tomato Puree Rasam, Bolu Huli, Bitter Gourd Sabzi, Gojjavalakki and several other dishes. So, if you have the rasam powder in stock, you could get your meal ready in just a few minutes!

Ingredients:

1 cup Jeera

1 cup methi seeds/fenugreek

1 cup Black pepper

1 cup Mustard

8 cups Coriander seeds

6-8 cups Dry red chilies, adjust quantity according to taste

3 cup Curry leaves

Method:

  1. Dry roast each of the ingredients separately until you smell the fresh aroma of the spice and the color changes lightly;Keep aside and let cool.
  2. Powder the roasted spices in a blender; DO NOT add any water while powdering.
  3. Store in airtight containers; To make rasam, follow Tomato Puree Rasam.

Tip:

  • While measuring red chilies, chop them into tiny pieces; This way, its a lot easier to stuff into cups and measure them.
  • While powdering, you might want to powder coriander seeds and dry red chilies  separately 'cause, coriander seeds and red chilies take longer to grind.
  • Rasam powder has a shelf life of about 6 months, so feel free to make enough and store in air tight containers.
  • You might want to store this masala in the refrigerator to retain its freshness and aroma.

Prep Time: About 30-40 mins;

Makes: Enough to fill a 500ml bottle;

Thursday, October 21, 2010

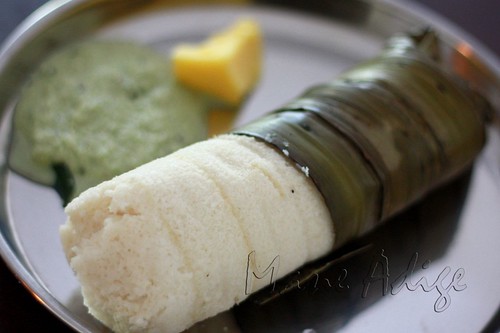
Moode/Mude ("Kedige" Flavored Idlis)


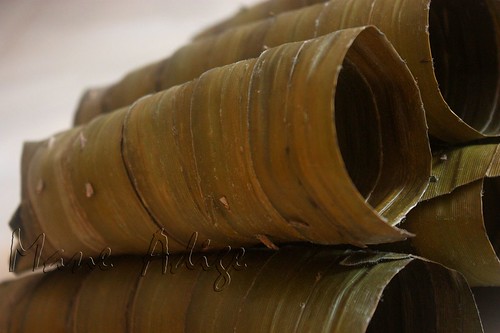
This ones a very traditional Mangalorean recipe! Idli batter is filled into moulds made of a certain variety of leaf, known as Kedige in Kannada (English: Screw Pine. Read more here). These leafy moulds add a distinct flavor and aroma to the idlis that makes them really unique and delicious! Moode is made on special occasions like festivals and weddings. These kedige leaf moulds, more popularly known as "moode ele" are available in most vegetable markets during festive season. For those of you that have never seen moode  ele, here's how the moulds look


Here is how to make it...

Ingredients:

1 cup urad dal (Soaked in water for about 4-6 hours)

2 cups idli rava / White rice (Soak white rice in water for 4-6 hours)

Salt as per taste


Method:

  1. Grind the soaked urad dal to a smooth dal until it froths up and increases in quantity.
  2. Wash the idli rava and drain out all the water; Add rava to the urad batter and grind further until it blends well with the batter (About 3-5 minutes). If you are using soaked white rice, drain out all the water and add to urad batter; Grind until it blends well and forms a smooth paste.
  3. Transfer into a large mixing bowl and let ferment overnight or for 8-10 hours; Add salt and mix well.
  4. Pour into moode ele (kedige moulds) and steam cook for about 20-25 minutes; Moode is done when no grains stick to the fork when pierced.
  5. Remove from stove and serve hot with coconut chutney, sambhar, gashi or any other side dish of your choice.

Note:

  • If you are grinding urad dal using the blender, it generally takes about 10-15 minutes for the batter to froth up; Make sure you stop every 5-7 mins and mix with a spatula. In case of a grinder, it takes about 25-30 minutes.
  • While storing the batter for fermenting, make sure the bowl is large enough to accommodate the rise in batter quantity.
  • While pouring the batter into moode ele, fill it only up to three fourths.... Moode will rise further while it cooks.
  • I use a pressure cooker (without weight) to steam idlis and moode. You could also use idli cookers that are available in the market. In either case, add enough water at the bottom to withstand 20 minutes of steaming.
  • It is important to ensure that moode ele stays upright while it cooks. You wouldn't want the moode to fall off and let the water from the bottom of the cooker get in. So, I place each moode separately inside long steel tumblers.
  • To remove the moode from the mould, slowly pull out the tiny sticks that hold the mould together; The mould will fall apart automatically.

Sunday, June 27, 2010

Mysore Masale/ Mysore Masala Dosa


Well, this one needs no introduction! Mysore masale, as most of you would know, is one of the most famous dishes of Karnataka. This dish is so liked by people all over India, that each place has its own variations and versions. "Red Chutney" is the one thing that makes Mysore Masale different from ordinary masala dosas. Red chutney adds a beautiful flavor and spice and makes this dosa indeed delicious. I believe that my mom makes the best Mysore Masale in town ;), and what's more, she is a Mysorean herself!!! :)  Here's the recipe....

Ingredients:

For Dosa Batter

Follow Paper Plain Dosa recipe for batter ingredients and procedure

Masale (palya)

2 medium sized Potatoes - Pressure cooked, peeled and mashed coarsely.

3 medium sized Onions - Chopped into thin strips

1/2 to 3/4 tsp Haldi/Turmeric powder

1 tsp Lime juice (optional)

1/2 tsp Sugar (optional)

1" Ginger, finely chopped (optional)

3-4 strands Cilantro, finely chopped

3-4 Green chilies, medium spiced - coarsely chopped

5-6 Curry leaves

1 tbsp Oil

1 tsp Mustard seeds

2 tsp Chana/Urad dal mixture

Salt as per taste

Red Chutney

2 tsp Chana Dal

2 tsp Urad dal

5-6 Dry Red Chilies, low spiced

1/2 cup Grated coconut, fresh/frozen

Method:

Masale:

  1. Heat oil in a heavy bottomed pan; Temper with mustard seeds, curry leaves, dal mixture, haldi, ginger and green chilies.
  2. Add sliced onions and fry until done;Note:Adding half a tsp sugar gets the onions roasted faster.
  3. Add mashed potatoes, salt and mix well; Remove from stove.
  4. Add lime juice, cilantro and mix well; Keep aside.

Red Chutney:

  1. Dry roast chana dal, urad dal and red chilies until you smell the fresh aroma of spices.
  2. Grind with coconut and some water to a smooth paste; Keep aside.

Mysore masale:

  1. Make dosa as explained here - Paper Plain Dosa .
  2. When the dosa is almost done, smear a spoonful of red chutney on the inside of the dosa.
  3. Spread a ladle full of masale on one side of the dosa; Fold the dosa so that the masala and chutney are on the inside.
  4. Remove from stove and serve immediately with some Coconut chutney and/or sambhar

Makes: Enough masale and chutney for 3-5 dosas;

Prep Time: About 30-40 mins;

Wednesday, February 24, 2010

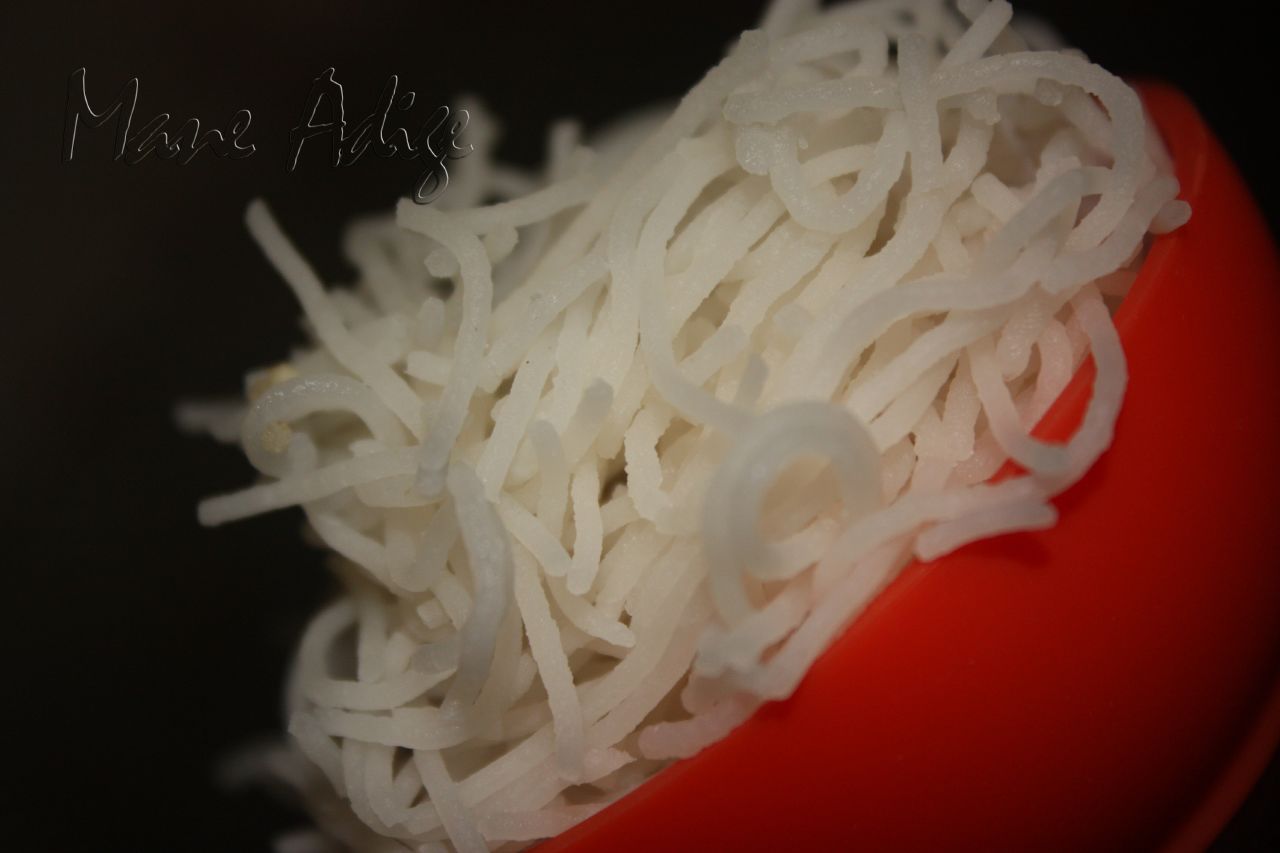
Ottu Shavige/ Semige/ Home made Rice Noodles


So, its been over a month since my last post on Mane Adige. My little boy was sick for a couple of weeks last month and I've been busy with his ped checkups and tests. Haven't really been able to collect too many recipes this month, but here's a traditional one from my drafts. This delicious recipe is easier told than actually made! But Shavige is definitely worth all the effort you put in. Shavige is made in many different methods. Here's the easiest and the one that my mother in law follows.

Ingredients:

3 cups Boiled Rice (uncooked)

1 cup White Rice (uncooked)

Salt as per taste (optional)

Method:

  1. Soak boiled rice and white rice in enough water for about 4-5 hours.
  2. Grind the soaked rice to a smooth paste; Use as little water as possible.
  3. Pour the ground paste into a heavy bottomed pan and cook on medium flame.
  4. Saute regularly and cook until all the water evaporates and the mixture forms a single dumpling.
  5. Separate into smaller tangerine sized dumplings and steam cook for about 15 minutes; I use a pressure cooker (without weight) to serve the purpose. The dumplings are cooked when a knife pierced into it comes out clean without any crumbs sticking onto it. Note: Make sure the dumplings are cooked well. Shavige would stick to each other and come out as a lump, if it isn't well cooked.
  6. Press into thin noodles using the chakli or Shavige press.
  7. Cool and relish with sambhar, pickle, Gasagase Payasa or any other side dish of your choice.
  8. OR make the Chitranna masala and mix to make shavige chitranna.

Note: Use the "bille" (the circular, detachable bottom portion of the press containing perforations, through which the dough oozes out) with multiple tiny perforations for making shavige.

Wednesday, January 20, 2010

Jhunka


A  North Karnataka recipe for you guys this time!! My aunt lives in Haveri. The cook at her home had earlier worked at a north Karnataka speciality restaurant, I suppose. So, my aunt's family gets to savour some of the traditional north Karnataka dishes, and I get to collect recipes from her cook and try them out in my kitchen :)

When I got hold of this recipe from her, I wasn't too impressed initially..... "Kadle hittu palya na?? thooo...." I thought! But I was so wrong. It tasted so different and refreshing! It was very different from the usual South Indian  style palya's, but I relished it thoroughly! If you are the kind that prefers dry sabjis,  this one is definitely worth a try. Here is how to make it....

Ingredients:

1 cup Besan/Kadle Hittu/Chickpea flour

1 Onion, medium sized

1-2 tbsp Water

1 tsp Chili powder

1/2 tsp Haldi/Turmeric powder

1/2 tsp Jeera powder

1/2 tsp Sugar (optional)

1 tsp Lime juice

1 tbsp Cooking Oil

1/2 tsp Mustard seeds

1 strand Curry leaves

2-3 strands Cilantro, finely chopped

1 tbsp Grated Coconut (optional)

Salt as per taste

Method:

  1. Peel and finely chop the onion; Keep aside.
  2. Heat oil in a pan; Temper with mustard seeds and curry leaves.
  3. Add the chopped onions and fry until they turn lightly brown; saute regularly.
  4. Add haldi, chili powder, Jeera powder, salt, sugar and mix well; Cook for a minute.
  5. Add besan to it and roast until you smell the fresh aroma of roasted besan (about 1 min).
  6. Add water little by little until the mixture forms a single dumpling ; Saute continuously to make sure no lumps are formed;Cook covered for about a minute or two - saute regularly.
  7. Remove from stove; Add grated coconut, chopped cilantro, lime juice and mix well.
  8. Serve hot with rotis/chapatis and relish!

Prep Time: About 15-20 minutes;

Serves: 2 people;

Wednesday, January 13, 2010

Ellu Bella


Sankranti wishes to all Mane Adige readers!! Sankranti, as you all know, is the festival of harvest.In Bangalore-Mysore regions of Karnataka, this festival is celebrated by exchanging "Ellu-Bella" with family and friends. Young girls get dressed and go house hopping for Ellu-Bella, sugar cane and other goodies. For more information on the festival, check out Wiki . Will head straight to the recipe now...

Ingredients:

1 cup Copra/Kobri/Dry coconut, with its skin peeled and chopped into very fine and uniform pieces

1 cup Hurigadale/Chana Dhalia/ Putaani

1 cup Peanuts, dry roasted and skin peeled off

1 Cup Finely and uniformly chopped Jaggery

Quarter to half cup Sesame seeds/Til/Ellu (White Til)

Method:

  1. Dry roast the sesame seeds until they turn golden brown in color; Keep aside.
  2. Halve the roasted  peanuts and keep aside; Note: Make sure not to burn the peanuts while roasting them; Ellu bella looks good when the peanuts are lightly golden in color. Peeling off the skin is a lot easier after roasting the peanuts.
  3. Mix all the ingredients together; Store in air tight containers and relish.

Monday, September 7, 2009

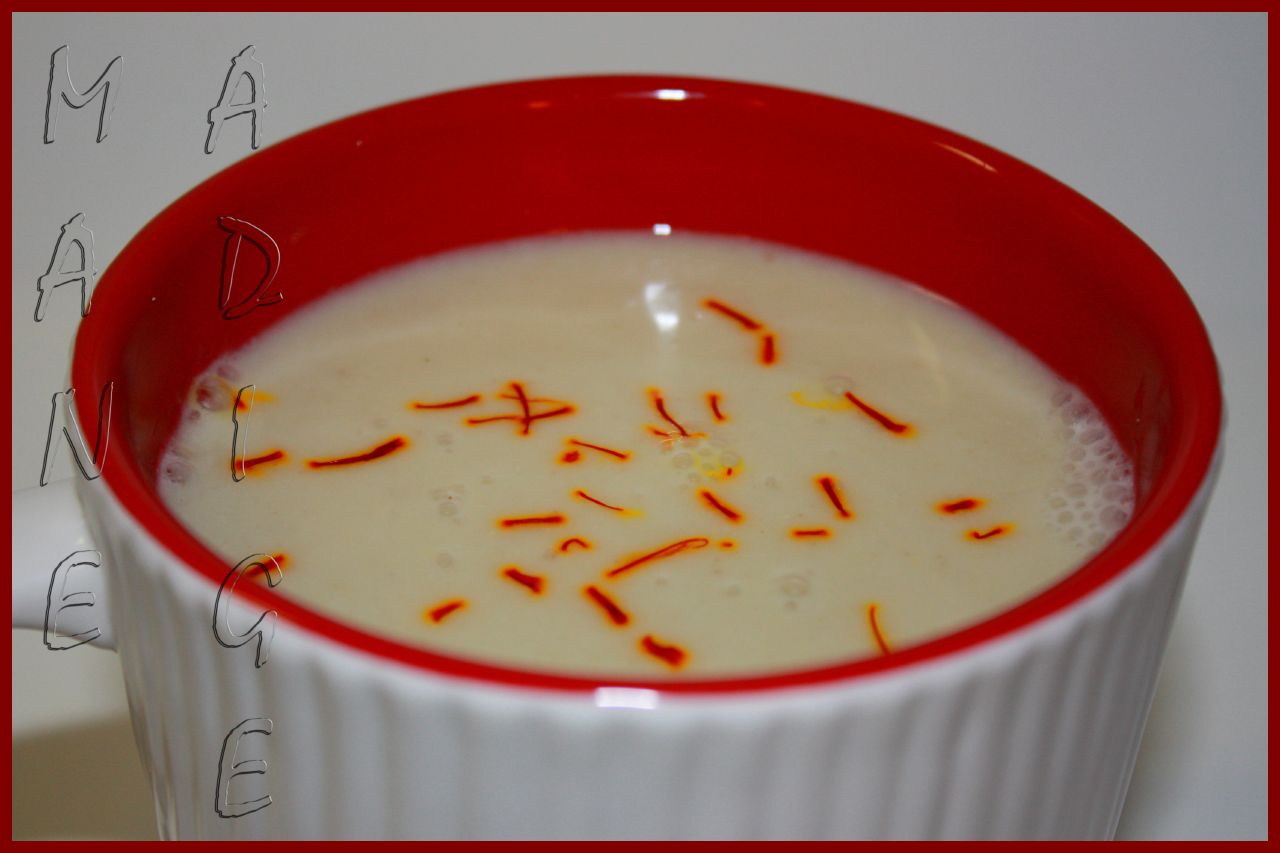
Annada Kesari Bhaat / Sweet Saffron Rice


Hey folks! All well at your end, I hope.... Things have been good at my end,apart from the cough and cold that everyone in our house is falling prey to. The weather out here in Bengaluru has been pretty gloomy and rainy. Probably that's the reason why everyone around seems to be falling sick so often.

My Ajji- Taata are here with us since a couple of weeks and I am getting to learn a whole lot of traditional dishes from  my Ajji! One such dish that I learned from her was "Annada Kesari Bhaat". This dish happens to be one of my favorites, and I love it even more after having learned how easy it is to make :) Have a surprise guest at home? You could put this together in just 10-15 mins!

Ingredients:

3/4 cup Cooked white rice ( I like mine to be mushy and well cooked)

1 cup Sugar (Adjust quantity according to taste)

1/4 cup Ghee/Clarified butter

8-10 Saffron strands

1-2 tsp Warm Milk

1 tbsp Raisin-Cashew mixture

1-2 drops Food color (optional)


Method:

  1. Soak saffron strands in warm milk and keep aside.
  2. Heat a pan on medium flame and add 1/4 cup of water to it.
  3. Add all the sugar and stir until it dissolves completely and forms a thread like consistency; Note:Add just enough water to dissolve all the sugar.
  4. Add half the quantity of ghee to the pan and stir until it dissolves.
  5. Add the cooked and mashed rice, food color and remaining ghee; Pour the milk with saffron strands over it and mix thoroughly.
  6. Roast the cashews and raisins in 1 tsp of ghee and add to the Kesari Bhaat; Serve hot and relish!

Tuesday, August 25, 2009

Nimbekai Uppinakai/Lemon Pickle


Hey folks, I'm back! I have been off blogging for over a month now, haven't I ??!?! Time flies here in India... really!! :) August has been a busy month for Naveen and me. We landed in Bengalooru on the 24th of July... The first few days went by in deciding on my doctor and hospital, getting the Internet connection up and running, getting a SIM card for each of us and other such immediate necessities. I have decided to go ahead with Columbia Asia, Hebbal for my delivery.... Any suggestions/experiences/opinions regarding Columbia Asia, Hebbal are more than welcome! :)

After the major task of choosing my doctor and hospital, I was at my in-laws place for a couple of weeks at Mangalooru. Rainy season that it is in India right now, it was pouring cats and dogs in the coastal city of Mangalooru (or Mangalore, as it was known till recently).... Not that it helped in cooling down the weather in any way!!! Despite the heavy rains and the high temperatures, I managed to have a wonderful time out there... hogged on all the traditional south canara dishes, stalled the famous "Pabbas" ice cream parlor almost daily, met up with all our good friends! My in-laws had also arranged for a traditional  and elaborate "Seemantha" ceremony for me. Got done with all that and returned to Amma's place in Bangalore last week. And now that even Naveen is back to work in Mangalore, I seem to have a lot of free time in hand. I am also enjoying all the pampering while it lasts :)

Both, my Ajji (Mom's mom)  and amma, make amazing pickles. This traditional recipe for lemon pickle is theirs too. Glad that I was with amma when she was making it last time.... I got a chance to take a few pictures and learn the procedure. Though very easy to make, I must warn you before hand that this one is a very time consuming procedure and it takes a lot of patience . But once you get to taste this pickle, you will never like any of the store bought ones.  So, all you folks who love home made pickles and have the patience to wait, should definitely try this one!!


Ingredients:

10-12 Fresh lemons, medium sized

15-20 Dry Red Chilies, low to medium spiced

2 tsp Methi seeds

1 tsp Hing

Salt as per taste and requirement

Method:

  1. Wash and chop each lemon into 8 pieces and keep aside.
  2. In the jar that you will be using to store the pickle, drop 8-10 pieces of chopped lemon; Sprinkle a generous amount of salt all over; Continue the process for the remaining pieces as well; Close the lid of the jar tightly and keep aside for 4-5 days. Note: Make sure you pick a jar/bottle with a lid that closes tightly.
  3. Open the lid of the jar and mix thoroughly with a steel spoon; You will see that the lemons would have given out enough water because of the salt.
  4. Close the lid of the jar tightly and keep aside for another 20 days; Remember to mix thoroughly, once in every two days.
  5. Dry roast red chilies, methi seeds and hing until you smell the fresh aroma of the masalas. Powder the roasted masalas in a blender without adding any water.
  6. Add the powdered masalas to the salted lemons and mix thoroughly; Keep aside for 2 days.
  7. Relish with dosas, rotis, parathas, idli, curd rice or just some hot steamed plain rice!

Prep Time: About 30-40 mins, excluding storage time;

Makes: Enough to fill a 500ml bottle;

Tuesday, July 7, 2009

Gasagase Payasa / Poppy Seeds Payasam


Hey everybody! Hope y'all had a safe and fun filled long weekend. We spent ours at New York!! Amma Appa were awestruck by all the tall and beautiful buildings, the busy crowds on the streets, abound dining and shopping options..... They loved it all :)

And btw, have I told you guys that we are moving back to India in a couple of weeks?? In case I haven't mentioned it yet.... Naveen and I are moving back to India for good!!!! :) By the end of this month, we'd be in India among family and friends.....Oh, I am so very excited!!!! But before that, we have a whole lot of packing and winding up to do here.The next two weeks are gonna be really busy!!! In the next couple of months, I may not be able to blog as regularly as I would want to... But I'm sure you folks will understand! :)

Anyway, coming to today's recipe... Gasagase Payasa is very traditional and authentic to Karnataka. As most of you would know, poppy seeds are the source of opium. So, don't be surprised if you find yourself dozing off after having a hot cup of Gasagase Payasa :D. There are different ways of making Gasagase Payasa..... some people soak the rice and poppy seeds, while some others roast and powder it. Here's how we make it in our family....

Ingredients:

4 tsp Poppy seeds

1 tsp White Rice, uncooked

1 cup Grated Coconut, fresh/frozen

1/4 cup Desiccated coconut/Copra/Kobbari

3-4 tbsp Jaggery

1/4 cup Milk

1/2 tsp Elaichi, powdered

4-5 strands of Saffron (optional)

8-10 Cashews/Almonds (optional)


Method:

  1. Dry roast poppy seeds and rice until they turn crisp and lightly change color.
  2. Finely powder the roasted poppy seeds and rice in a blender without adding any water.
  3. Add  grated coconut, desiccated coconut, some water and grind to a  smooth paste.
  4. Add half a cup of water and strain the paste through a finely perforated strainer; Retain the liquid - this will  make the payasam later.
  5. Transfer the coarse residue into a blender; Add some more water and grind again to a smooth paste.
  6. Repeat steps 4 and 5 about 3-4 times.
  7. Add jaggery to the strained liquid and boil on low-medium heat until all the jaggery dissolves; Remove from stove.
  8. Dissolve saffron strands in 1/4 cup of warn milk and set aside for 5-10 mins.
  9. Add powdered elaichi,warm milk with saffron and mix well; Serve hot and relish.

Prep Time: About 40-45 mins;

Serves: About 3-4 people;

Thursday, June 18, 2009

Menthya Gojju/ Fenugreek seeds cooked in Tamarind & Jaggery sauce


What is the best part of pregnancy, you ask me?? Well, its definitely the pampering and all the fuss around me, by everyone in the family :) Nothing I say is ever put off! I now indulge gracefully in all my cravings, without the least bit of guilt :D. Ramya wants to go to DQ's for a Sundae, late in the night, and so the entire family goes along without any objections!!! Mom picks and chooses all my favorites dishes and makes them for me.... Some of them, I had almost forgotten they existed. I'm loving this phase of pregnancy!! :) I have also been feeling the baby moves and kicks for over a month now. It feels wonderful! I had confused them for hunger pangs, initially, but learned to differentiate in a few days. The first trimester was terrible with all the morning sickness, and I am already dreading the huge belly that I'm gonna be carrying in the thirst trimester.... The second trimester is the golden phase, as everyone says, and I'm enjoying it while it lasts! :)

Here is a simple and quick recipe that takes very few and common ingredients that are usually present in any South Indian pantry. People who relish bitter gourd (Karela) will definitely love this one. This is a bit of an acquired taste and you might have to try it a couple of time before you actually like it...

Ingredients:

2 tsp  Fenugreek/Methi/Menthya seeds

2 tsp Chana Dhalia/Hurigadale/Putaani

1 tsp Tamarind paste

1 tbsp Jaggery

1.5 tsp Rasam powder

1 tbsp Grated coconut fresh/frozen (optional)

2 tsp Oil

3/4 tsp Mustard seeds

3-4 Curry leaves

A generous pinch of Hing

A pinch of Turmeric

Salt as per taste

Method:

  1. Dry roast the fenugreek seeds until them turn lightly red in color; Make sure not to burn them.
  2. Add half a cup of water and pressure cook until done; It takes about 2-3 whistles in my cooker.
  3. Heat oil in a heavy bottomed pan; Temper with mustard seeds, curry leaves, hing and turmeric.
  4. Add the cooked fenugreek seeds, rasam powder, jaggery, tamarind paste, salt and boil well for about 4-5 mins; Add a little water if required.
  5. Meanwhile, coarsely powder the chana dhalia using a blender; Add chana dhalia and grated coconut to the boiling gojju and mix well; Add water to get the desired consistency; Adjust ingredients according to taste and boil further for a minute or two;
  6. Remove from stove and serve hot with hot steamed rice/ dosas/rotis and relish.

Prep Time: About 30-40 mins;

Serves: About 2-3 people;


Monday, June 1, 2009

Aviyal

Aviyal, as most of you would know, is a Kerala speciality dish. Dakshina Kannada (Mangalore-Udupi) cuisine is highly influenced by Kerala cuisine because of its proximity to Kerala. Aviyal is one such adaptation. While Aviyal is made thick and "sabzi/palya" kinds in Kerala, it is more of a gravy in Karnataka. With a whole lot of veggies, this dish is healthy, nutritious and quite easy to make! Serve with some hot steamed rice and it makes a wonderful comfort food.

Ingredients:

2 cups Mixed veggies, chopped into 1" pieces (green beans, carrots, tindora, potatoes etc)

1/2 cup Grated coconut, fresh/frozen

1 cup Yogurt/Sour curd

2-3 Green Chilies, low to medium spiced

1 tsp Jeera

1-2 tsp Oil

1 tsp Mustard seeds

4-5 Curry leaves

A pinch of Hing

Salt as per taste

Method:

  1. Boil the veggies with some salt and water until tender and cooked; Drain the cooked veggies and retain the excess water.
  2. Grind coconut, jeera and green chilies to a smooth paste with some water.
  3. Add the masala paste to the cooked veggies and boil for a minute; Add salt and mix well.
  4. Switch off the stove and add yogurt; Add some of the retained water from the cooked veggies to get the desired consistency; Mix well and adjust ingredients according to taste.
  5. Temper with mustard seeds, curry leaves and hing; Serve with hot steamed rice and relish.


Wednesday, May 20, 2009

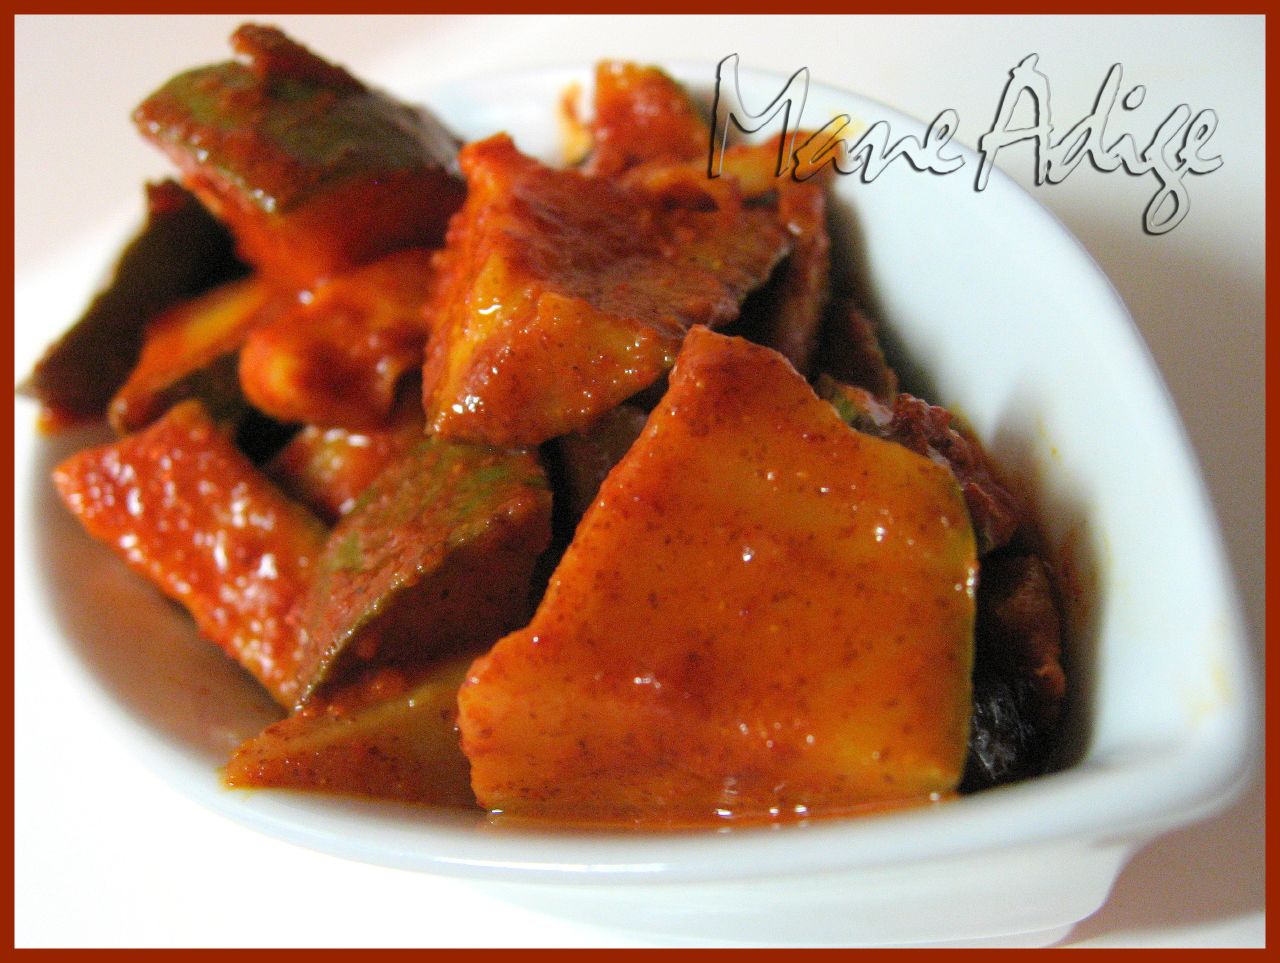
Maavinakai Kette Uppinakai (Instant Raw Mango pickle)


Pickles are something that everyone loves!!!!  As a child, I would have pickles with almost everything - idlis, dosas, plain rice & ghee, rotis or even bread!! :D And we always had a jar of home made pickles at home. In fact, I hadn't tasted store bought pickles until I shifted to the hostel during my Engineering days!! Amma makes different varieties of pickles and the one I have for you today is the simplest of all. Its fast, easy to make, takes very few ingredients and you need not have to wait for too long before you can start relishing it.... And it is also one of my favorites!!! :) Here's how Amma makes it....

Ingredients:

3 Raw Mangoes, medium sized

3tsp Mustard seeds

30 Dry Red Chilies, low to medium spiced

1tsp Powdered Hing

1 tsp Haldi/Turmeric

Salt as per taste


Method:

  1. Wash and cut mangoes into 1 inch cubes; In a glass jar, spread some of the cubes and sprinkle some salt over it; Add few more cubes and make another layer; Sprinkle some more salt ; Repeat the process for the remaining mango cubes and keep aside.
  2. Powder the mustard seeds and red chilies to a fine mixture; Add hing, turmeric and mix well. Note:DO NOT add any water while powdering the spices in the blender/mixie.
  3. Add the powdered spices to the mango-salt mixture and mix well with the help of a long spoon; Close the lid of the jar tightly. Relish with idlis, dosas,akki rottis, curd rice.

Tips:

  1. Choose mangoes carefully; The mangoes should be sour and hard.
  2. The pickle may seem a little dry on the first day, but DO NOT add any water; the mangoes will give out enough water in a day or two;
  3. Though this pickle can be eaten with any south indian dish, curd rice & pickle is the most famous combination.
  4. Though this pickle is sort of instant and can be used right away, it tastes great after a couple of days when the mangoes would have absorbed the masalas.
  5. This pickle cannot be stored for too long; Its average shelf life is about 1-1.5 months. As days go by, the mangoes would start becoming soft and start dissolving in the gravy.

Prep Time: About 30-40 mins;

Makes: Roughly enough pickle to fill a 450-500 ml bottle;

Friday, May 15, 2009

Badanekayi HinDi (Baingan Bharta, the South Indian style)


Hey people...I'm back!!! I had disappeared again for a coupla weeks, hadn't I??!?! Well, I didn't want to, but I got so busy with mom n dad that I could barely make time for anything else!!! Amma-appa landed early last week... They had a safe journey. They didn't have too much of jetlag either, thankfully :). Been busy showing them around Chicago, these days. Have also been relishing amma made food.... All the home made sweets and savories, varieties of pickles, daily morning breakfast.... yummm!!!! I'm loving it all. Amma's adige is the best in the world!!! :) I am trying my best to take pictures of most of the dishes that amma is making. Will post them one by one!

The recipe I have for you today is from the Sirsi-Sagar parts of Karnataka. This authentic recipe is very easy to make and is a perfect accompaniment with some hot steamed rice. Thanx to my friend Sangeeta for having shared this simple yet delicious recipe! :)


Ingredients:

1 Large purple eggplant

1 tbsp Grated coconut, fresh/frozen

1 Small Red Onion, finely chopped

1 tsp Amchur powder OR 1 tsp  Lime juice

1 tsp Chopped Cilantro, for garnishing

2 tsp Oil

1/2 tsp Mustard seeds

2 Green chilies, slit vertically

1 tsp Chana+Urad Dal mixture

A generous pinch of hing

Salt as per taste

Method:

  1. Pre-heat the conventional over to 350 deg F.
  2. Smear the eggplant with a few drops of oil; Make a few cuts on the skin of the eggplant with a knife.
  3. Place the eggplant in an over safe container and bake for about 30-45 mins or until done; Tip: The eggplant is done when the skin shrinks and forms wrinkles all over. You could even poke a toothpick at the center and see if it is cooked completely.
  4. Remove the eggplant from the oven and let cool for a while; Peel off a thin layer of the skin with your hands and discard.... If the eggplant is cooked well it should come off very easily.
  5. Mash the flesh of the eggplant with the back of a spoon and discard the stalk.
  6. Add chopped onions, amchur powder, grated coconut, salt and mix well.
  7. Temper with mustard seeds, green chilies, dal mixture and hing.
  8. Serve hot with rice/rotis and enjoy!

Prep Time: About 60-90 mins;

Serves: About 2-3 people;

Thursday, April 23, 2009

Tomato Gojju


Hey people!! Hope alls well at your end. Long time indeed...... :) My apologies for having disappeared without even informing. To all my readers who have been mailing and asking me if everything was alright.....Yes, things are great!! Thank you so much for asking :). Past couple of months have been eventful for us, out here. The update from my end is that, Naveen and I  are expecting a new addition to our family in a few months from now!!! :) While we were very happy and excited about entering the next phase of our life, the first few weeks were also a little hard for us to cope with. Terrible nausea and morning sickness had kept me away from the kitchen all this while.... I could not bear the smell of food, leave alone cooking and eating it :D. I only lived on fruits all this while :D Naveen even had to stop using his perfumes 'coz I couldn't bear the smell of it :). Glad that the whole phase is over and am slowly getting back to normal. Will keep updating you guys from time to time, with all the happenings at my end....

Another update is that, my parents will be joining us here in the first week of May!!! :) I am really looking forward to having them over..... You guys could expect some nice "amma- made" dishes and recipes here on Mane Adige, after they arrive!! :)

Will now head straight to today's recipe.... Its a simple side dish that takes very few ingredients and gets done really fast. This gojju tastes great with dosas and chapatis. Make it a little more watery and its perfect with rice as well.... 

Ingredients:

4-5 Ripe tomatoes, medium sized

1 tsp Red Chili Powder + 3/4 tsp Methi powder OR 1-2 tsp Rasam Powder

1 tbsp Jaggery

4-5 Curry leaves

1/2 tsp Mustard seeds

1 - 1.5 tsp Oil

A generous pinch of hing

Salt as per taste

Chopped Cilantro for garnishing


Method:

  1. Wash and chop tomatoes finely; Keep aside.
  2. Heat oil in a heavy bottomed pan; Temper with mustard seeds, curry leaves and hing.
  3. Add the chopped tomatoes and covered for a few minutes; You could add a few spoons of water if the mixture is too dry but usually, tomatoes give out moisture as they cook.
  4. Add salt, jaggery, rasam powder and mix well; Continue to cook until done;If you are using methi seeds, dry roast them for a minute and then powder them in a blender without adding any water.
  5. Add water to attain desired consistency and boil well; Once done, remove from stove and serve hot with rice /rotis/dosas etc.

Prep Time: About 20-25 mins;

Serves: 2-3 people;


Tuesday, February 24, 2009

Chutney/Dip Mania Round-up!!

Hey Folks!!!  :) Hope alls well at your end. I'm sorry for having disappeared without informing..... The event round-up and a couple of other things had kept me busy!! The round-up for the "Chutney/Dip Mania" is ready .... In all, there were around 52-54 bloggers who sent across their entries!!!!! Thank you sooo much fellow bloggers & readers, for making this event such a huge success!! :) Here are all the entries....

                                                   upload

Kara/Spicy Chutney, Green Chutney, Coconut Chutney by Srividhya from "Appetizing recipes"               

                                                     upload


Cabbage Chutney, Bottlegourd Chutney, Tomato-Peanut Chutney by Pooja of "Sai Kitchen"

                                          upload

Carrot Chutney, Bird's eye Chili Chutney, Tangy mango dip (Maanga vella pachadi), Mint Chutney by Dershana The Footloose Chef

                                           upload

Cheesey Paneer Dip by Malini of "Khana Khazana with Malini"       


                                            upload

Shallots N Redchillies Chutney, Ridgegourd Peels N Sesame Seeds Chutney, Butternut Squash Chutney, Yogurt-Mayo Dip by Priya of "Priya's Easy N Tasty Recipes"


                                             upload

Gulla bhajji/smoked eggplant dip by Poonam of "Poonam's Kitchen"


                                            upload

Curry Leaves Chutney by Vijaya of "Daily Meals"


                                             upload

Mint Chutney by Anu Sriram of "Chandrabhaga"


                                                        upload

Kadale Bele Chutney, Red Chili Chutney by Vanamala of "Nalapaka"

                                            upload

Seemebadanekai Chutney by Pavithra of "Pakashale"

                                            upload

Pumpking chutney/Dip by Swapna of "Cooking with swapna"

                                            upload

Poodina / Mint Chutney, Brinjal Dip/ Baba Ghannouj/ Moutabal, Dill Chutney, Pachadi by Swapna of "Swapna's Cuisine"

                                            upload

Raw Mango Chutney, Carrot, Beet and Brinjal Chutney, Garlic Chutney by Lakshmi of "Taste of Mysore"

                                                    upload

Cilantro Dip (Coriander Dip), Peanut Chutney by Deepa Hari of Simple Home Cooking 

                                          upload

Roasted Tomato and Chickpea Dip by Supriya of "Queen of My Kitchen"


                                          upload

 Peerkangai chutney, Red pumpkin chutney, Mixed chutney by Poornima of "Madhu's cooking gallery"


                                          upload

Raw Tomato Chutney by Bhagyashri of "Taste Buds"

                                          upload

Onion Tamarind Chutney, Ridgegourd Chuteny, Chayote Squash Peel Chutney, Tofu Chutney, Lentil Chutney by Vidya of "Delectable Vegetarian Recipes"

                                        upload

Onion Dip/Onion thogayal by Kamakshi of "Sanctified Spices"

                                       upload

Homemade Salsa by Gayathri of "Gayathri's Adige Mane"

                                        upload

Gram dhal and Tomato Chutney by Hema of "Adlak'sKitchen"

                                        upload

Bartho (Eggplant Chutney) by Alka of "Sindhirasoi"

                                        upload

Brinjal/Eggplant Chutney by Madhumathi of "Madhu's Food Journal"


                                         upload

Onion Chutney by Uma of "Essence of Andhra"

                                         upload

Nadiya pachidi, Mango Chutney by Oriya Food  of "Home Cooked Oriya Food "

                                        upload

Eggpalnt chutney by Madhu of "Ruchii"

                                        upload

Heerekaayi Chutney / Ridge Gourd Dip by Pooja of "Iyers Kitchen"

                                        upload

Papaya Marcha, Pineapple Chutney by Meera of "Enjoy Indian Food"

                                         upload

Sweet & Spice Fruit Chutney by Soma of "eCurry"

                                         Ginger_Chutney_(Allam_Chutney)

Ginger Chutney by Nirupama Sunder

                                          upload

Pudina (Mint) Chutney, Tomato Chutney, Coconut Chutney, Kokum Chutney, Teel(Sesame seeds) Chutney, Coriander Chutney by Sanika of "Spicy & Tangy....Sweet & Yummy!!!!"

                                               upload

Horse Gram Chutney by Deesha of "Vegetable Platter"

                                                  upload

Red chilly chutney, Peanut chutney, beetroot , radish , sesame , coconut and amla chutney by Shama of "Easy 2 Cook Recipes"

                                             upload

Hummus by Nags of "Edible Garden"

                                                 upload

Karandi&Garlic chutney and Marinara sauce by Mangala of "Recipes 24/7"

                                   upload

Carrot Chutney by Kamala of "Mom's Recipes"

                                 upload

Dhania chutney by Priyanka of "Asankhana"

                                  upload

Cilantro Dips by Priya Sriram of "Priya's Sourashtrian Kitchen"

                                  upload

Hummus by Namarata of "Welcome to Namu's Kitchen"

                                             upload

White Radish Chutney, Mint Chutney by Rekha of "Plantain Leaf"

                                 upload

Tomato/Peanut Chutney, Tamarind/Onion Chutney, Keerai (Spinach) Chutney by Akal of "Akal's Saappadu"

                                  upload

Tamarind Hot N sweet chutney by Archy of "Archy's Recipe Book"

                                  upload

Horsegram chutney by EC  of "Simple Indian Food"

                                    upload

Spinach and Anaheim Chutney by Anudivya of "...and a little bit more..."

                                              upload

Lima Bean Hummus by Jai & Bee of "Jugalbandi"

                                         upload

Garlic Chutney by Bindiya of "In love with food"

                                                  upload

Onion chutney, Lemon-Chilly chutney by Chitra of "Ratatouille - Any one can cook"

                                     upload

Onion chutney by Cham of "Spice Club"

                                                upload

Roasted Coconut chana dal chutney, Spicy mixed dal dip by Asha of "Aroma"

                                       upload

Onion Tomato Chutney by Usha of "Veg Inspirations"

                                                   upload

Coriander Chutney, Methi Stem Chutney by Sumathi of "Chutney's"

                                            upload

Moolangi Chutney by Smitha of "Kannada Cuisine"

                                            upload

Badnekaayi Chutney by Alamelu of "RasagavaLa" 

                                            upload

Kadle bele chutney by Mythreyee of "Paajaka Recipes"


Like I had said before, one of the entries will be chosen as the WINNER  of the event!!! Of all the received entries ,13 entries have been short listed as the FINALISTS!!!!! My plan, initially, was to pick exactly 10 entries. But the entries were all so good that choosing among them was almost impossible for me. I had to finally take Naveen's help on this - who, by the way, is really hard to please.... So, all you finalists are winners already!!! :)

Anyway, since we HAVE to pick just one entry, I would like to leave the job of picking ONE WINNER to the readers of Mane Adige!!!! I will post a poll on Mane Adige with the short listed entries. Please vote for your favorite entry and help me in identifying the winner!! :) The short listed entries are

  1. Mint Chutney by Dershana The Footloose Chef
  2. Curry Leaves Chutney by Vijaya of "Daily Meals"
  3. Eggpalnt chutney by Madhu of "Ruchii"
  4. Sweet & Spice Fruit Chutney by Soma of "eCurry"
  5. Kokum Chutney by Sanika of "Spicy & Tangy....Sweet & Yummy!!!!"
  6. Horse Gram Chutney by Deesha of "Vegetable Platter"
  7. Marinara sauce by Mangala of "Recipes 24/7"
  8. Garlic Chutney by Bindiya of "In love with food"
  9. Spinach and Anaheim Chutney by Anudivya of "...and a little bit more..."
  10. Methi Stem Chutney by Sumathi of "Chutney's"
  11. Moolangi Chutney by Smitha of "Kannada Cuisine"
  12. Onion Tomato Chutney by Usha of "Veg Inspirations"
  13. Yogurt-Mayo Dip by Priya of "Priya's Easy N Tasty Recipes"

Looking forward to all your votes and opinion!! The poll is on the right side column of the blog. So, go ahead and cast your vote...

Oh, and btw... Authors of all the short listed entries are free to link back to this post and appeal for votes from your respective blog readers as well!!! :) Good luck!!!!!